Threaded Rod Working Press
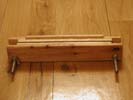 This is a pretty basic press. Its main advantage is that it it is cheap and easy to make. However, some care is needed in the construction, or it will do more harm than good. Also, it can be difficult to use. Getting a book into it, straight and aligned properly, tends to require either a third hand or a lot of patience. Nevertheless, as a starter press, it beats having nothing.
Materials Required
- A plank of wood.
- You want it to be at least 10cm wide (15cm would be better) and at least 1cm thick. The length should be about 4 times the desired finished length of the press, though a shorter piece can work (see notes below for how). Pine is OK to use, because it is unlikely to warp enough to create a problem.
- A smaller plank of wood.
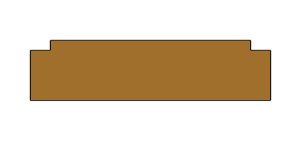
- It should be either taller than, or shorter than the first plank by enough to make the tongue or groove for the plough, and thick enough to fit easily with the plough tongue or groove. Since its precise height is not important, it can be planed down to fit if needed. It should the anticipated length of the press, unless you're using the modification below.
- Smooth surfaced hardboard to line the faces of the press.
- This is important, unless you want a woodgrain effect on everything you press.
- Threaded rod
- This should be as thick as you can easily get the hardware for. You'll beed 2 lengths, about 16cm long. I use 12mm rod, which comes in one-meter lengths from a large hardware store. It can be cut with a hacksaw, or a hacksaw blade on a jigsaw (using eye protection. If possible, get the same size as you use in your book press and/or sewing frame so you can share hardware.
- 2 wing nuts
- Sized to fit the threaded rod
- 4 washers
- Sized to fit the threaded rod
- 2 cap nuts
- Sized to fit the threaded rod. Using a cap nut rather than a hex nut on the end of the threaded rod means that the press can be laid down on a table while positioning the materials to be pressed. It will still need to be stabilised in this position.
Construction
First, make the press cheeks. With every step, make sure of two things:
- All pieces are precisely aligned.
- All grain patterns run the same direction.

- Cut the long plank into equal fourths (unless you're doing the modification below).
- Assemble one half of the press by gluing and screwing two of the pieces together, making sure they are precisely lined up. Do not put any screws within 4cm of the short edges of the boards. Countersink the screws so the heads are flush with the surface.
- Cut the shorter plank to the same length as the pieces of the longer plank. If you are creating a tongue, cut this piece down to the same width as the longer plank for about 6cm on each end (this will allow you to rest the press, flat side up, in a box). If you're making a press with a groove, you don't need to cut out the corners.
- Assemble the other half of the press. Sandwich the tongue or groove piece between the two longer other pieces, again making sure everything is precisely lined up. Glue and screw the pieces together, keeping the screws at least 4cm away from the short edges. Countersink the screws.
- Cut two pieces of hardboard to the dimensions of the press (as determined by the four pieces of the longer plank).
- Glue the hardboard over the screw heads on each of the press pieces
- After all the glue has dried, mark out the drilling holes. Make them 2cm in from the short edges of the pieces, precisely on the midline of the planks.
- Clamp the press pieces together, hardboard pieces facing each other. Make absolutely certain they are lined up evenly. Then drill out the holes, being careful to keep the drill perfectly vertical.
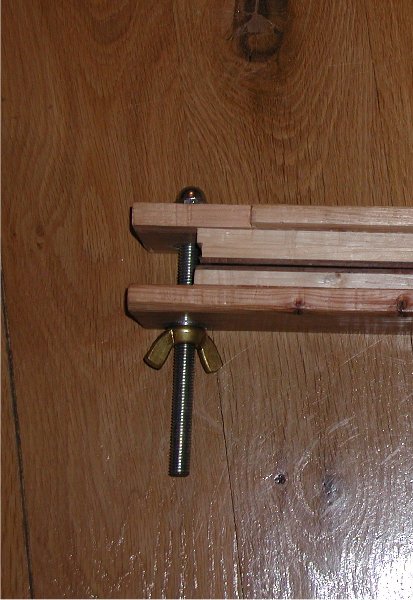
Next, assemble the hardware, making sure the cap nut is next to the thicker, tongued or grooved cheek.
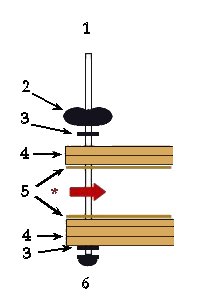 |
- Threaded rod
- Wing nut
- Washer
- Press cheek
- Hardboard
- Cap nut
* Book goes here
|
 |
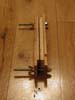
When I first made my press, I didn't quite have enough wood for the "ideal" solution described above. I made a modification that saved about 12cm of wood with little functional difference to the press. In theory, it resulted in a weaker press. In practice, it made no difference.
Basically, rather than having all pieces go all the way to the end of the board, I cut the inner pieces shorter. The threaded rods only went through the outer pieces, then crossed a gap.
|
Lessons Learned in Construction
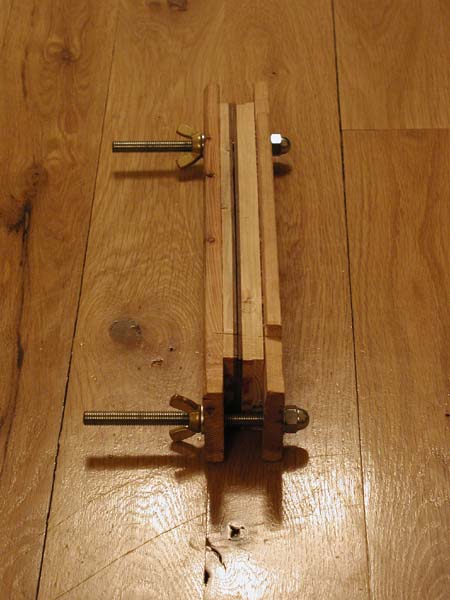
The best way to improve the design is to find some way to tighten the threaded rods with one hand, preferably by turning the rod rather than a nut. I cheated in this regard - I found an old wooden clamp and adapted it. Other suggestions are welcome, particularly ones that can be sourced from your local hardware store.
 This is a pretty basic press. Its main advantage is that it it is cheap and easy to make. However, some care is needed in the construction, or it will do more harm than good. Also, it can be difficult to use. Getting a book into it, straight and aligned properly, tends to require either a third hand or a lot of patience. Nevertheless, as a starter press, it beats having nothing.