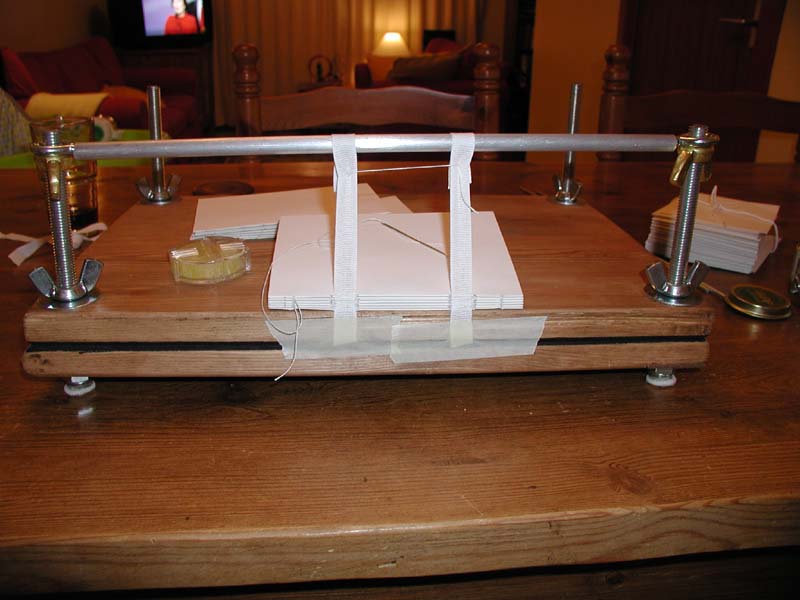
I made this basic press, based roughly on a design in The Craft of Bookbinding, by Manly Banister. The book recommends making the press out of hardwood, which would have been expensive and hard to work with. Instead, I made it out of pine, which was much cheaper. I knew the pine would eventually warp under a combination of moisture and pressure. However, I felt that by the time it did I would know whether bookbinding was a passing fad or a serious enough hobby to spend more money on.
The basic design is made up of two flat boards with holes drilled in all four corners. To provide a smooth pressing surface, the inner surfaces of the boards should be lined with hardboard. The pressure is provided by wing nuts on threaded rods.
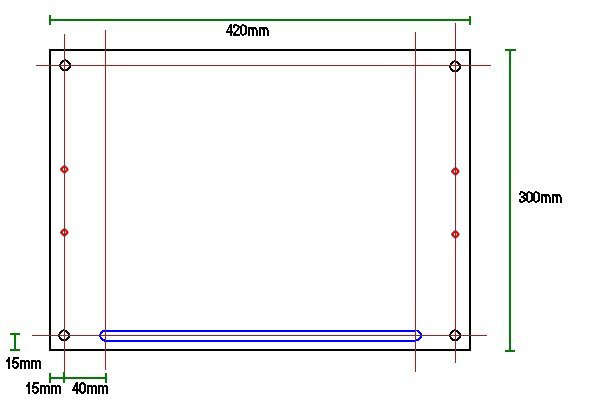 Here is a diagram of the main part of the press - the plates. You will need two in wood and two in hardboard. Click on the diagram to get an enlarged version with measurements. The features in red are optional unless you're making the metal press, and those in blue are needed to use the press as a sewing frame You'll notice that there are no diameter measurements for the corner holes - drill them just larger than your threaded rod, whatever size that ends up being.
Glue the hardboard to the wood surfaces. You can use the press itself to apply pressure to the glued joint.
Assemble the hardware on the threaded rods as below.
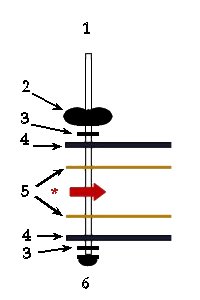
* The red arrow indicates where the book goes in pressing.
When I originally constructed the press, I cut my threaded rods very long (33cm). These proved more effort than they were worth, and I subsequently used my hacksaw to cut them down to 16cm. Unless you seriously anticipate pressing multiple editions most of the time, the extra length of rod is a serious annoyance. They complicate storage, catch on everything, and mean that it takes a long time to screw wing nuts down. If you do want to retain the capacity to do enormous pressing jobs, I would suggest having two sets of rods, one long and one short.
As I anticipated, the press warped after about four months' continuous use. But by then I was interested enough in binding to replace it with a metal press.