
22.2 x 15.5 x 1.8 cm
Sometimes the ideas for book designs come thick and fast. I tend to note them as they come in my small carry-around blank book, but they can easily get lost in the plethora of other things I also write in there. I kept telling myself I needed a separate book to keep track of them, sort of a library for my design ideas.
I could have simply bound a blank book for the purpose, or bound up multiple signatures of the template I use for book designs. But something about the idea of having so many pages to play with, and no more, made me feel constrained. I wanted a book I could add a signature to from time to time.
Besides, I wanted to be a bit creative with book structure, just for fun.
Note that I am going into a lot of detail on the theoretical aspects of this design. That's because I'm aware that, for every decision I made, there were numerous other choices. I'm hoping that someone else on the web will consider those other choices, and possibly improve on this design. If that's you, get in touch and tell me how it goes!
The overall concept was a book into which one could sew additional signatures after binding was complete. This meant:
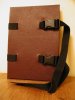
I quickly settled on backpacking webbing as the best supports. I tend to keep it around, it's easy to get buckles to use as tensioners, and I've wanted to incorporate it into a binding for some time. I thought it might be useful for the straps to wrap all the way around the book and buckle on the front, for added structural stability.
The first major design challenge was how to thread the straps. I decided they should lace through the cover. But there are two ways to lace a strap through covers*:
 This configuration protects the spine by slightly recessing it behind the edges of the boards. How far depends on where you thread the webbing, of course. But the fore edge is awkward, with the straps binding the edges of the pages. And I didn't feel that the final effect would be sufficiently book-shaped.
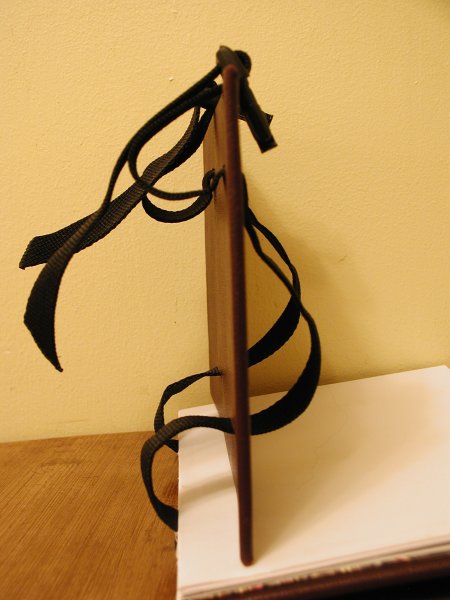
 This threading leaves the spine exposed, but allows the straps to fasten over the edges of the boards on the fore edge, rather than over the pages themselves. It was also going to be a lot easier to protect the book block from the lumps of the straps (see below) if those lumps were in the middle of the boards rather than at the edges.
So the final result (as shown with the back cover) was:
* Actually, there are more ways. It depends how many times you want the tapes to pass through the boards. However, I wanted the tapes to thread through more than once (or the whole structure would be too floppy, with tapes dangling free). And more than two threadings seemed fiddly and unnecessary.
The structure of the cover boards was the key to making this design work. If I had used simple boards of uniform thickness, I was going to have lumps where the straps were threaded, which would have made it a difficult book to write in. So I made the covers of two layers of card, and cut insets for the straps to ride inside the book.
 The board on the left is the front cover, with the spine side to the right. Note that the slits to thread the strapping out on the fore edge are set in further than those for the rest of the book. This was to accomodate the buckles on the front cover.
The slits at the fore edges are also slightly wider than the others, because sewing the buckles onto the strapping neatly meant threading a double thickness at that point. I even carved the outer cardboard a little thinner there, to ensure a flat lie.
The back cover is on the right. In addition to the strap cutaways, it has insets in the corners for hook and loop attachments. See the discussion about the back "endpaper" for how that works.
I then covered both boards with leather, pasting down as normal, and dried them under pressure. After they were dry, I cut slits in the leather to correspond to those in the cardboard, and threaded the webbing through them.
Even having cut grooves for the strapping, I was still facing a certain lumpiness in the covers. To smooth this out, I used some thin cardboard to make "pastedowns" inside both covers.
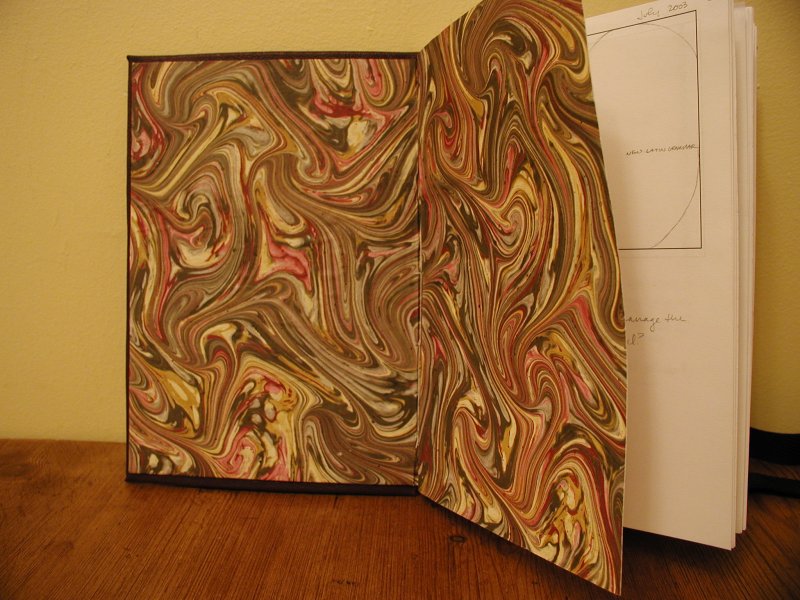 I considered having the signatures in this book float free from both covers, but decided the entire structure would be a bit too incoherent that way. So I decided to anchor them to the front cover somehow. The best option was to make the front "endpapers" thick enough to act as a one-page signature, to which additional signatures could be chain-stitched at will.
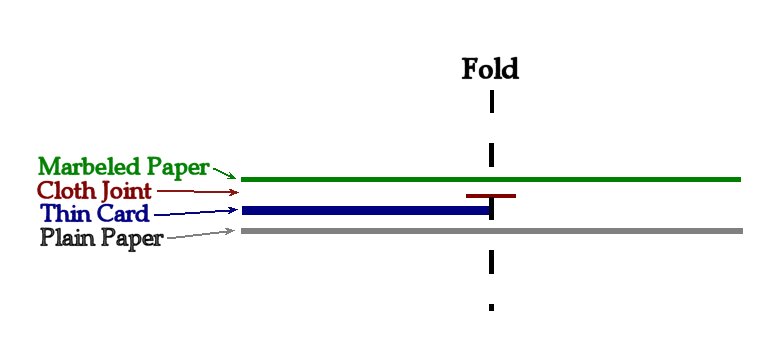 The structure was fairly complex: part of it had to be stiff with thin card to cover the straps, the spine had to have a cloth reinforcement, and the marbled paper I was using isn't very attractive on the back. The final structure was layered as shown.
The left side of the endpaper structure was then glued down over the inside cover (after threading the tapes). It was placed flush with the spine end and leaving a square on the other three sides. I punched holes as described in the "Stitching" section below.
 Unlike at the front, I didn't want a flyleaf at the back of the book. I figured it would look a bit strange, slightly separated from the book block itself. Instead, the back "pastedown" was purely to cover the straps and the raw edges of the leather.
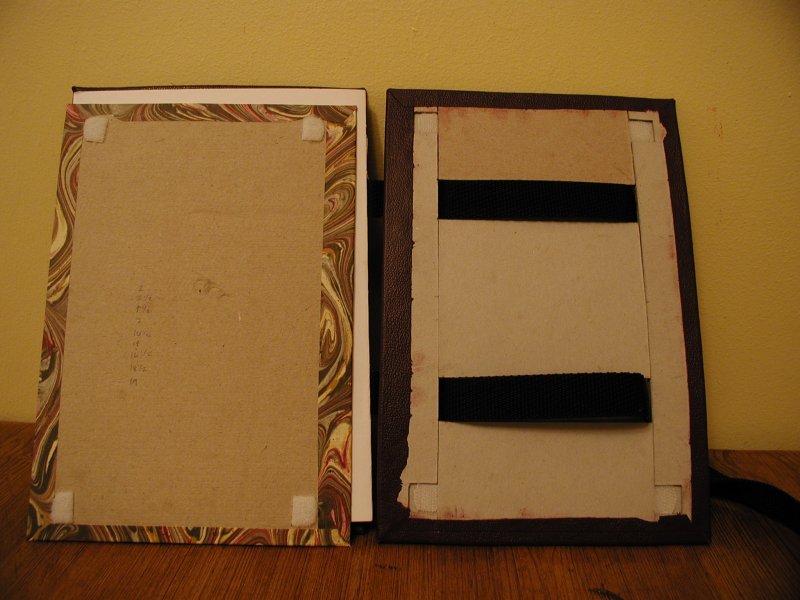 It became apparent, thinking about the mechanics of sewing onto straps, that it might be useful to have the back "pastedown" removable. Otherwise, if the webbing straps couldn't move easily in their channels within the cover, the book would be restricted to its original thickness. I decided that hook and loop fastening would be the best means to achieve this. Because the fastening would have some thickness itself, I cut recesses in the back cover board in the corners where the pieces would go.
The structure of the back "pastedown" was simple - just a piece of thin card covered with marbled paper on one side. I was careful to place the hook and loop fastening so that the back sheet, like the front, would be flush with the spine side of the boards and have a square on the other three sides. To aid in placement, I used a bone folder to lightly score the outline of the card on the leather turn-in.
 This is the only area that I am fairly dissatisfied with. (Though not enough to redo it, however easy that would be.)
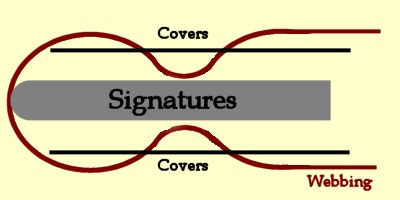
Each signature has 9 holes in it (the spacings of which are noted on the inside of the back "pastedown", to prevent me having to recalculate them every time). There is a pair of holes at the head and one at the tail, which act as "kettlestitches", plus holes on either side of the webbing tapes. In addition, there is a single hole in the middle of each signature.
The threading is classic figure-eight work, in and out of all the holes, creating a line of stitching on the inside and the outside of each signature.
 This is intended as a notebook to record book design ideas. I found, when sketching these ideas, that I was always using the same basic book shape. So I automated it.
Most of the signatures are 4 sheets printed out in double-sided landscape. They have 4 copies of a basic open-book shape, one to go at the top of each final page, with space for notes below. (I can't currently locate the template, but here is the book shape.
Occasionally, I bind in a blank signature for more freeform notes.
(There is, of course, no concern about binding cross-grained in this book, since none of the signatures ever gets damp.)
As noted above, using a single hole in the middle to try to create a "kettlestitch" effect was a mistake. Next time, I'll put a pair of holes in the centre and use the same chainstitch equivalent that I did at the head and tail.
I didn't decorate the cover of this book when I finished it, because I wanted to start using it straight away. And now other projects have taken precedence, and it remains blank. Typical.
...don't fit on shelves very well. Maybe a thinner equivalent to the buckles next time.