

31.8 x 23.4 x 1.0 cm
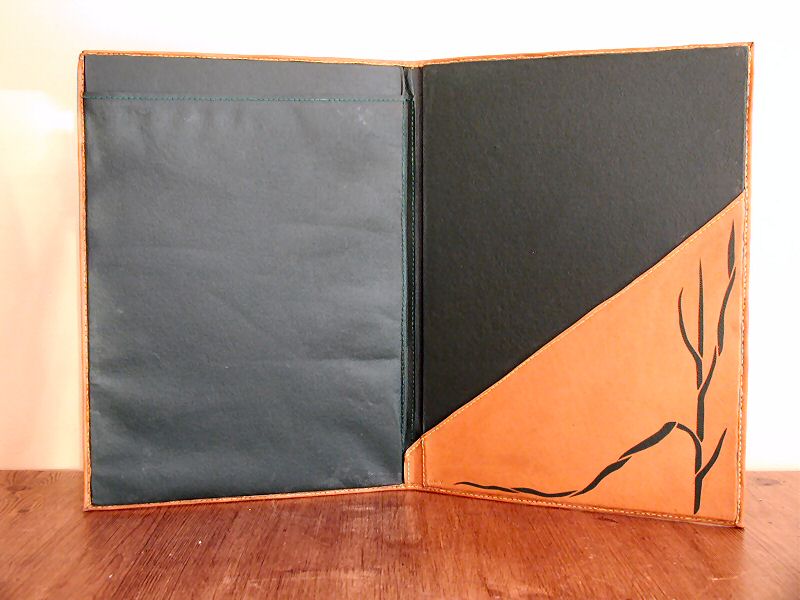
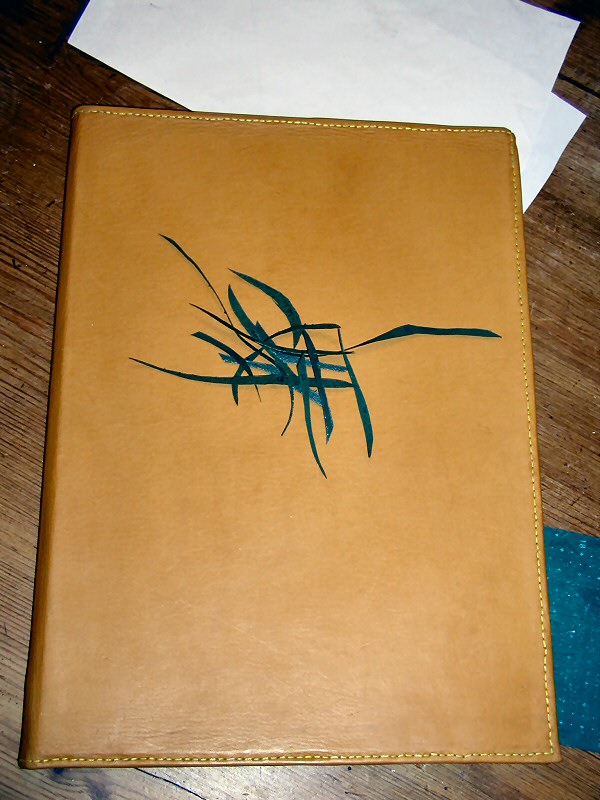
Gold bookcalf and green skiver portfolio designed for left-handed use. Onlaid with "grass" design in green skiver. Created for my father.
I suspect that being left-handed is a form of death by a thousand cuts. There are very few things you cannot do in this dextrocentric world, but pretty much everything is just that little bit more trying. Take writing in a standard padholder/portfolio. A left-haded user of a right-handed portfolio rustles all the papers in the paperholder while trying to write. So I reversed the standard design.
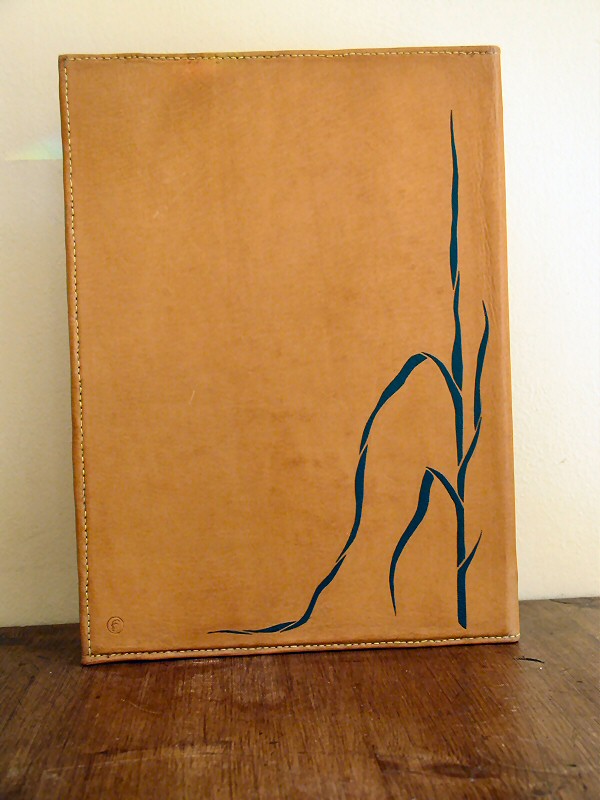
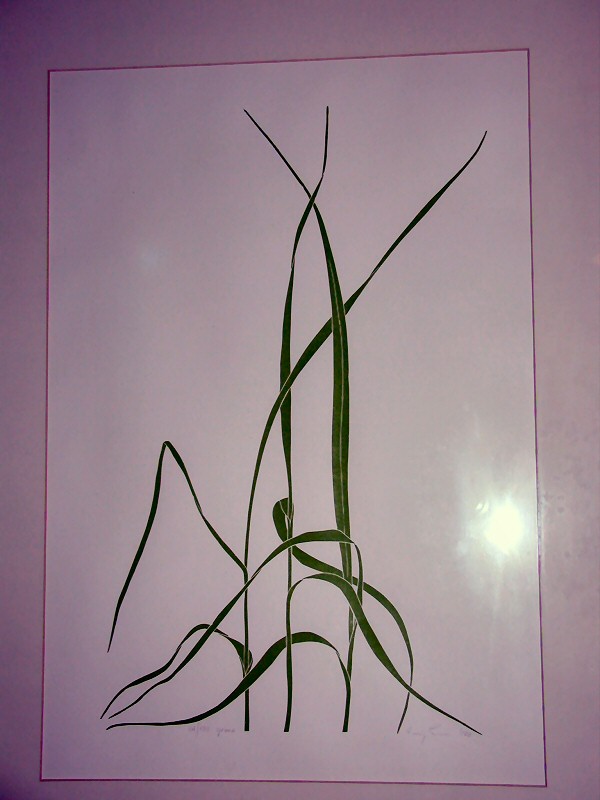 Once I had the structure decided, I started considering decoration. I wanted to make this portfolio truly special, particularly to my dad. One of my family's treasures, which has fallen to me, is a Henry Evans lino print, "Grass". Without trying to match Evans' mastery of composition, I used his treatment of St Augustine grass as a basis for the onlay design.
The choice of materials was more difficult than the choice of motif. From the moment I started thinking of this project (in the autumn of 2002), I knew I wanted to use a particular golden bookcalf. It's some of the nicest stuff I own, ideal for blind or gold tooling, easy to pare, with good colour and texture. But the rest of the materials took longer to settle on.
Originally, I was going to line the inside with green fabric, and use gold bookcalf for the pad holder. But I tried using fabric on a prototype, and wasn't satisfied with the effect. At the same time, I finally found some green textured skiver at Hewit's that I was willing to use for the grass. Unfortunately, I got a little too enthusiastic about that skiver, and didn't think clearly about its strength. It tears like paper, and I used it in structural locations. This means the portfolio will always be a little delicate. (Fortunately, I have given it to an adult, who will care for it. I shudder to think what a teenager would do to it. Or a toddler.)
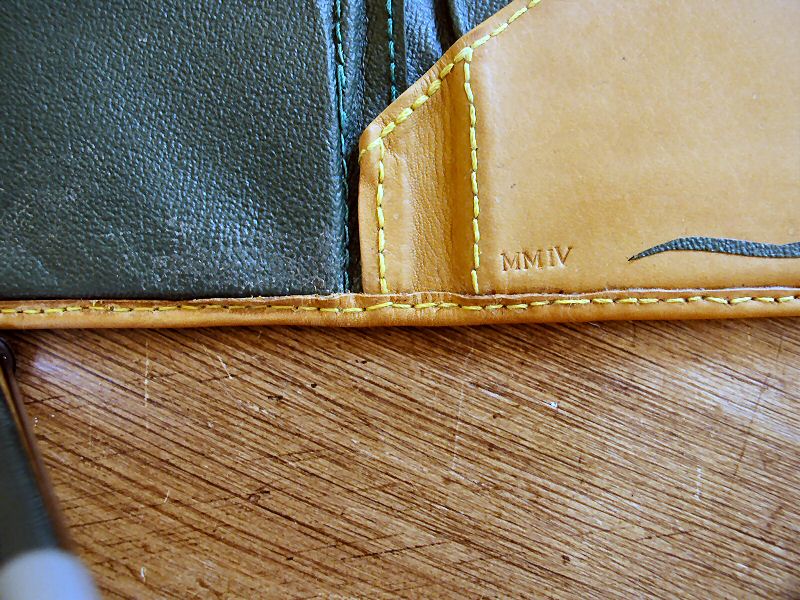
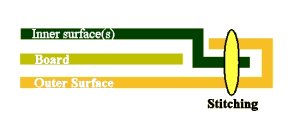
The portfolio relies on two different structural mechanisms: paste keeps the leather surfaces stuck to the boards, and stitching holds the edges together. The edge-stitching also forms both of the pockets.
Assembly was a step-by-step process.
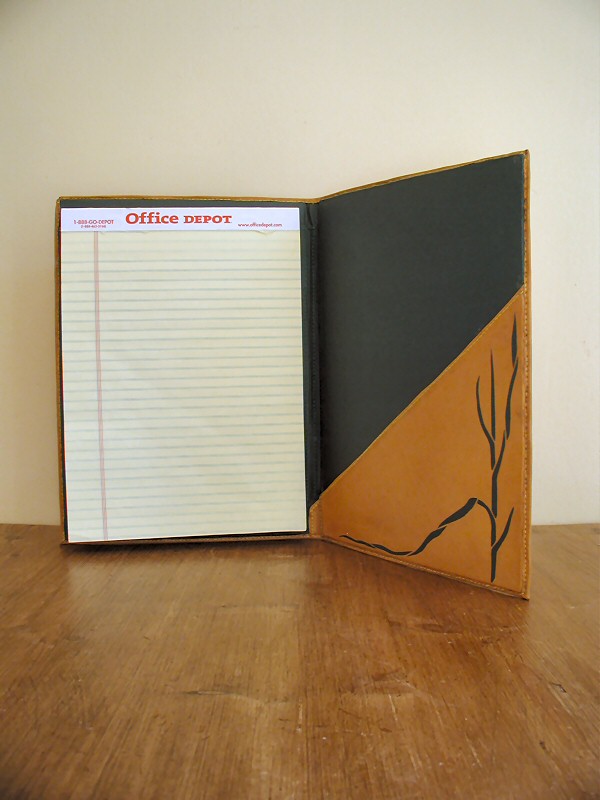 The first step of the process was detailed planning. Living in the UK, I don't use the same paper sizes as my dad in California. So I had my mother bring me a yellow pad from his office to use in the sizing.
While waiting for the pad, I made a prototype, which taught me that I needed to make the central hinge at least 3 cm wide. (On the prototype, it's 1.5 cm, and the portfolio can't hold more than a thin pad. The thicknesses of the boards and leather add up.
The core of the portfolio is made up of two rectangles of 2mm millboard, sized to allow a 1 cm margin all around the yellow pad. To ensure the boards were evenly spaced and parallel, I glued the boards down to a sheet of rice paper, aligned to pre-measured markings.
I cut out the leather based on tissue paper templates. The templates used the finished size of the portfolio plus either narrow or wide seam allowances. On the diagrams below, red lines indicate "wide" (10 mm) seam allowances and blue lines indicate "narrow" (5 mm) ones.
Before assembling any of the leather pieces, I did some preparation.
 Finally, I stitched the gutter corner of the loose paper holder to the gutter on the inner lining. The overlap was only about three centimeters high, but visually and structurally important.
Next, I pasted the calfskin outer piece onto the boards, on the same side as the rice paper positioning piece. I let the paste dry overnight, then pasted the inner assembly down to the other side.
 The next step was to stitch down all of the edges. This would define the pockets, neaten the edges, and prevent the leather from peeling off of the boards over time. I used the large seam allowance to wrap around the smaller inner edges, and pasted the entire assembly down before pre-punching and stitching. Note that the inner edges did not extend 5mm beyond the board edges, because they had to cover the flat edge of the boards.
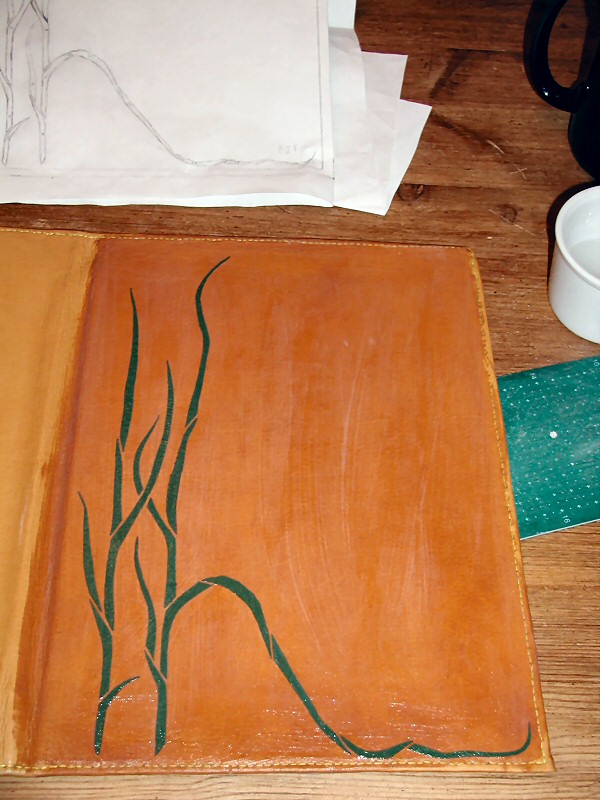 I planned the onlays using bank paper (thicker than tissue paper, thinner than ordinary paper). I cut the bank paper to the sizes of the outer layer and the loose paper holder, then designed the onlays in pencil. Once I was happy with the designs, I coated the back of the drawings with white chalk and traced the shapes of the onlays onto the skiver. I numbered each piece on both the diagrams and the skiver, because many of them were such similar shapes. Lying on the portfolio, the pieces didn't look that promising.
Once I had the pieces cut out, I was ready to paste down. To avoid watermarks, I pasted one entire side of the portfolio at a time, then laid the pieces out with reference to the design. (Note that the diagram below has one less piece than the final design. The composition didn't look right until I added one last twist to a particular leaf.) Note the plan in the background.
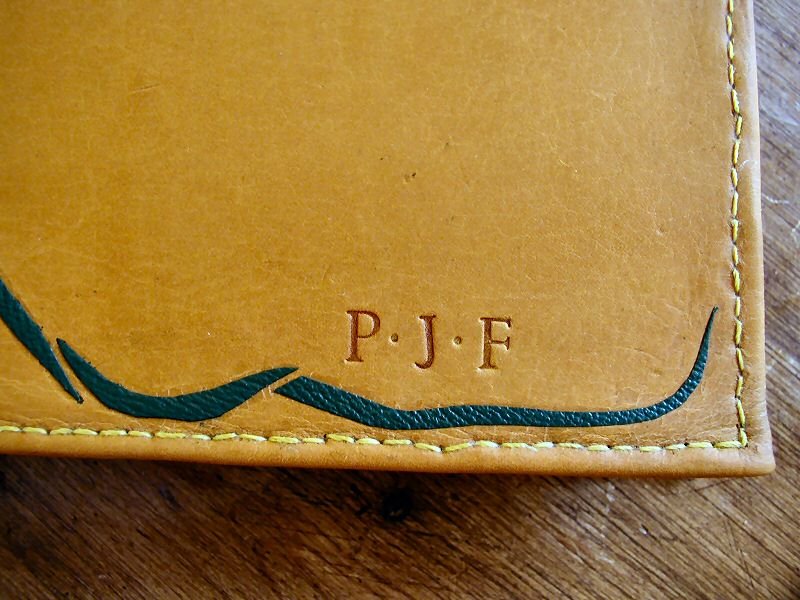 The final stage was to blind tool my father's initials, my evilrooster maker's mark, and the year of binding in Roman numberals. Then I sent it off to California, where I hope it will give him many years of pleasure.