| Go to Site Map | ||
 |
 |
 |
|
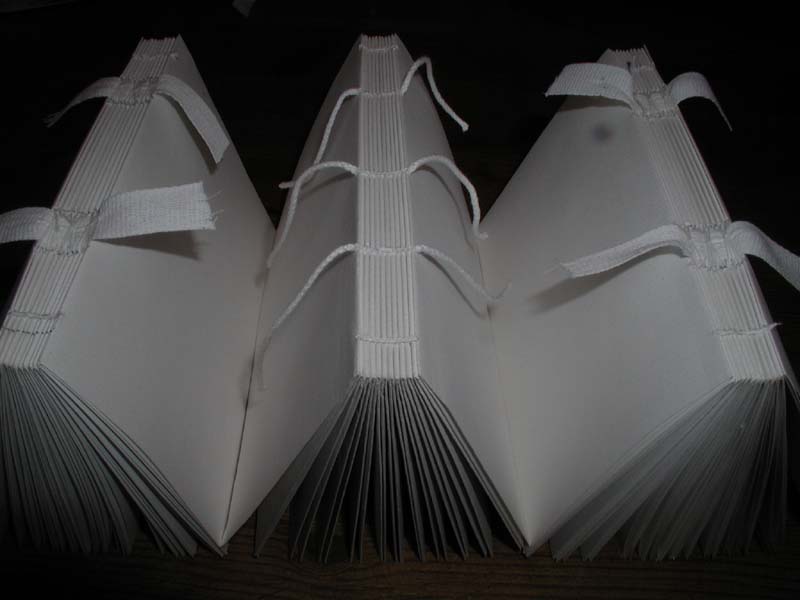
Click on a ribbon to follow a specific book |
||
| Go to Site Map | ||
|
|
|
|
|
Click on a ribbon to follow a specific book |
||
This step was performed on all three books.
 This was the step that really turned each book into a solid unit. After I'd sewn the book blocks together and trimmed them even, what I had still didn't feel like a book. It was too disparate. The signatures tended to spring apart, and I could see the tapes or cords holding the block together from inside the book.
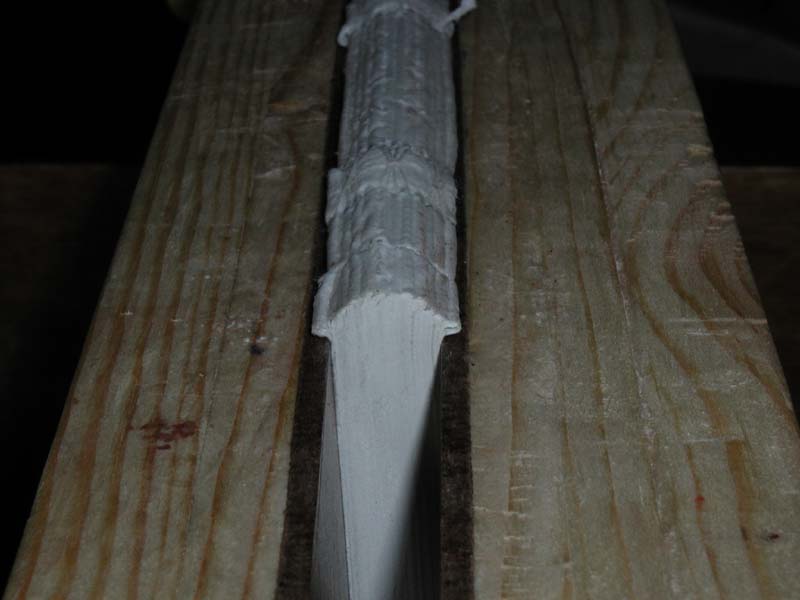
After all of the folding and sewing that the signatures have had, they were noticeably thicker at the spine edge than at the fore edge. The difference is called the "swell", and had to be minimised for the book to have the right shape. There were two stages to minimising the swell.
2005: It is often helpful, before rounding and backing, to "tip on" the first and last signatures. To do this, run a 2mm line of thin glue up the gutter where the first signature meets the second one. You can get an even line by using the edge of a piece of waxed paper to keep the glue off the rest of the page. Close the book on the glue, do the equivalent on the back, and leave under heavy pressure for an hour or two. Really helps the solidity of the book block.
To round the book, I knocked the straight-backed spine into a curved shape. This rounding process also caused the fore edge of the book to go concave. It's a beautiful style, slightly old-fashioned in these days of flat-backed and perfect-bound books. (That makes me sound old, doesn't it?)
2005: Yes. I do sound old. Many binders, particularly young whippersnappers, skip the whole rounding and backing thing and make flat-backed books. If you choose to do this, skip this step, case your book in, and use a piece of cover-weight cardboard for your spine strip on the case-making step.
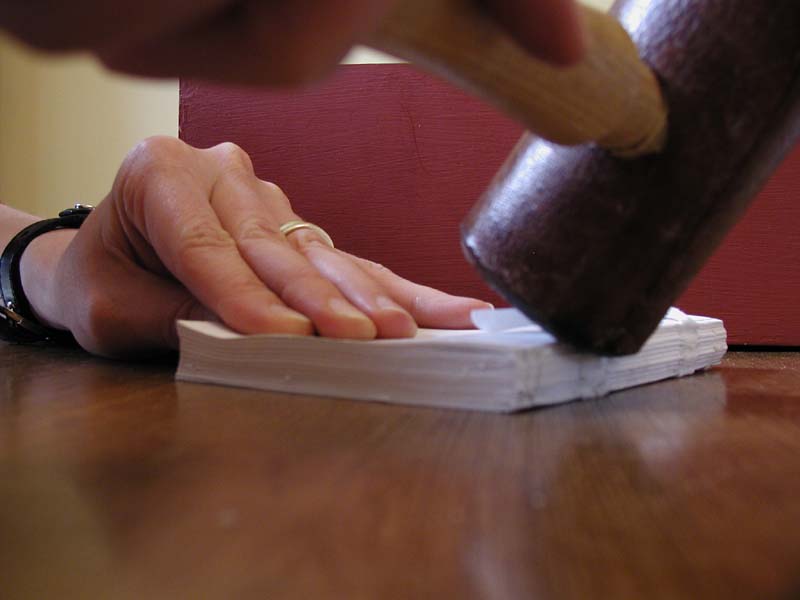 To round the book, I coated the spine with PVA glue and waited for it to go mostly dry. Then I laid the book flat on a table, making sure the spine was to my right. I put the fingers of my left hand against the fore edge, and my thumb on top of the book block. I used a hammer to tap the backs of the topmost signatures of the book block to move them to the left. It's important to do this gently and gradually - there's only so much flex in the structure. Then I turned the book block over and did the signatures on the other side. It took several iterations to get it sufficiently curved.
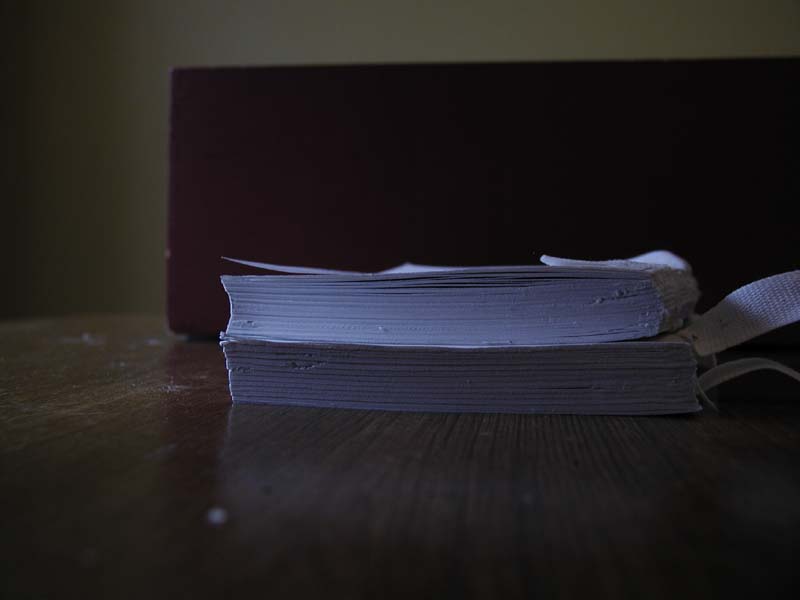 Comparing a rounded spine to an unrounded one. Note how the fore edge is rounded as well. (Note also the uneven patches on the edges of the book blocks. There were still flaws in my trimming skills.)
The second stage was backing, which created the curved shapes that make up the spines of all three books. If you look at the head of an old-fashioned book, you'll note that the tops of the signatures are not all parallel. Instead, the outer signatures are bent to the side at various angles. This creates "shoulders", which balance the spine edges of the covers.
To achieve this effect, I first spent some time measuring and marking. I drew a line parallel to the spine on the outer sheets of each of the books. (These sheets are known as the "waste sheets", and are generally used up sometime during the bind). The lines were two board thicknesses away from the spine, that is, twice as far away from the spine as the cover cardboard was thick.
Time for action. I coated the spine in PVA again. I proved to myself in the failed experiment on the blue book that this step has to be done with a flexible glue like PVA. Once the glue was tacky, but not yet dry, I put the book into my equivalent of a backing press. I made sure the lines on the waste sheets were just visible, and tightened the press. Professional binders use wedge-shaped "backing boards" to ensure the pressure of the backing press is up against the ruled line on the waste sheets. I find that careful control of the tension on the press does well enough for books with heavy pages.
2005: Actually, backing boards can really improve the process. Particularly ones with a brass lip to keep them from slipping down and falling out of the press. But a beginning binder can do a lot of backing with a good, tight press before they become necessary.
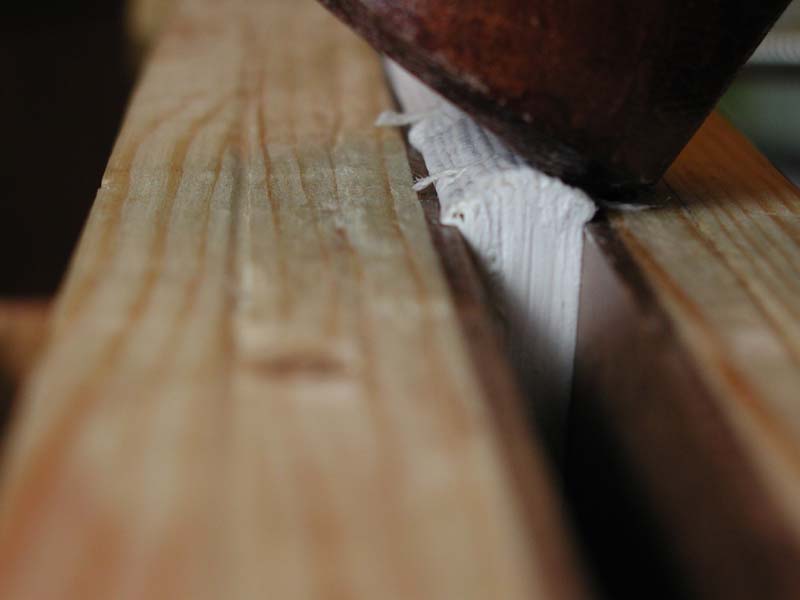 Once the book was in the backing press, it was time to get the hammer out. I used gentle, glancing blows to drive the backs of the signatures into the right positions. Experience has taught me not to try to get the signatures into place in one blow, or even in four or five. It took many small blows, up and down the spine on both sides, to create the right effect. In the process, I was also beating the glue into the paper. This solidified the spine. When I start finishing my covers, solid spines will be an asset.
 The rounded and backed book.
| Go to Site Map | ||
 |
 |
 |
|
Click on a ribbon to follow a specific book |
||