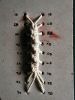

The half-hitch millipede stitch is a method of unsupported sewing that creates a stronger link among signatures than ordinary kettlestitch or Coptic sewing does. I developed it after seeing the Caterpillar stitch in Exposed Spine Sewings by Keith Smith. I wanted to make an unsupported version of the Supported Spiral Notebook I had just completed. Unfortunately, for my purposes, the Caterpillar has two disadvantages. First of all, it takes a while to get underway (7 rows - I wanted something more like 4 rows' run-up). And second, it doesn't turn. Not ideal for a spiral that starts with a sharp curve.
When I first came up with the millipede stitch, I decided to use the half-hitches purely to bulk up the body. It needs bulking up, because all those extra rows in the Caterpillar add layers of thread to the body. A quick start for a millipede means fewer threads running through any given segment. Having done the knot, I find the spiral shapes from the knots visually appealing as well. Also, the knots serve to lock the stitch more firmly in place than the Caterpillar's thread-wrapping does.
 Symmetric |
The stitch has two forms: symmetric and asymmetric. The symmetric alternates leftward-twisting knots and rightward-twisting knots on alternate sections of the millipede body. The asymmetric form, meanwhile, uses rightward-twisting knots exclusively. Athough the symmetric form is the simpler from a theoretical standpoint, I find the asymmetric easier to create. (A left-hander would probably find the leftward-twisting knots easier and might want to reverse the asymmetry.) | 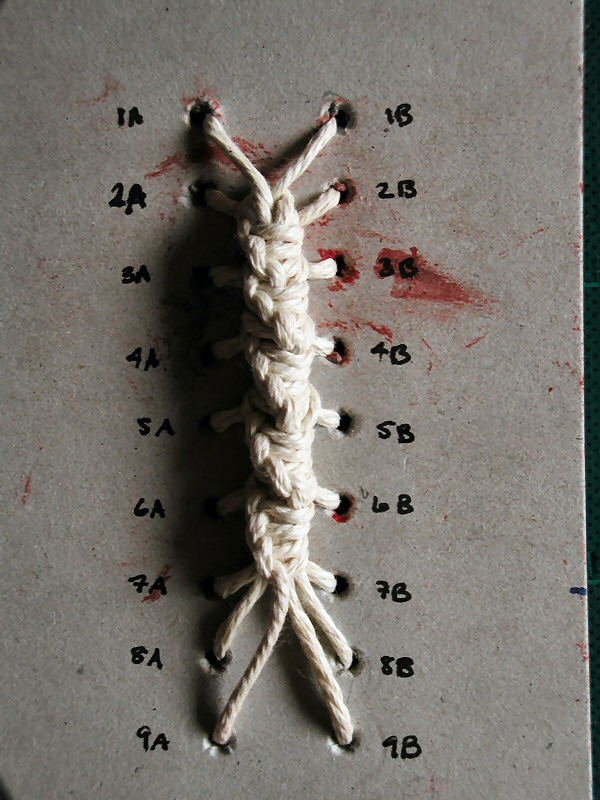 Asymmetric |
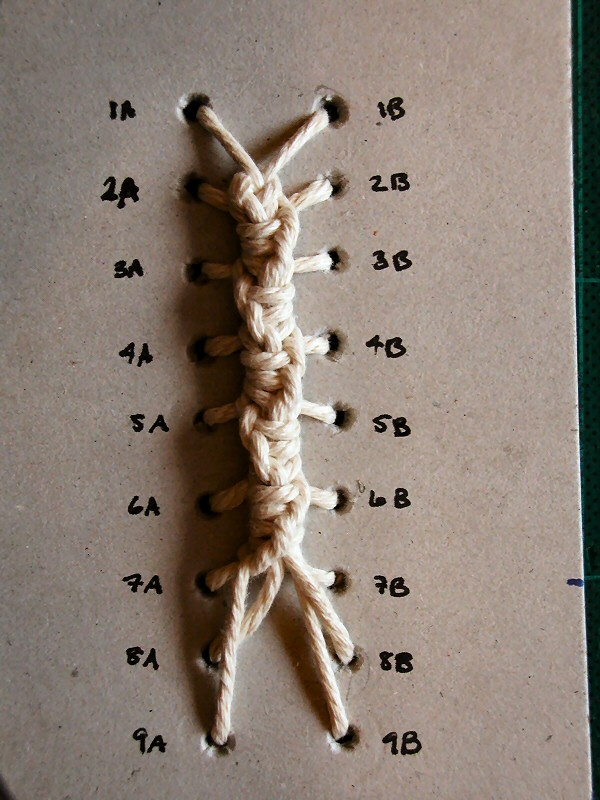
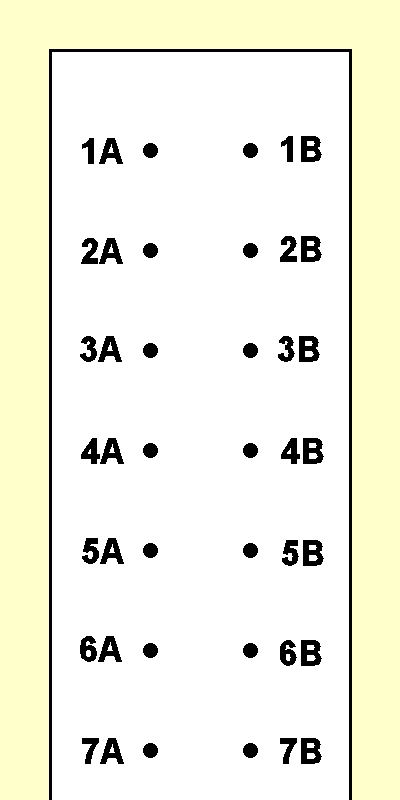 The photographs below illustrate the stitch in several variations. For the purposes of this illustration, I worked it in string in rows of paired holes in a sheet of cardboard. The rows could as easily be signatures, because the string never changes rows at the back of the work. To explain things more easily, I have labeled the rows by number and the columns by letter, as demonstrated to the left.
| Both symmetric and asymmetric millipedes start out the same, with the creation of the head. | |
|
Symmetric Millipede For a symmetric millipede, each thread crosses over the body at the start of the stitch.
|
Asymmetric Millipede In the asymmetric millipede, threads travel clockwise around the millipede's body, no matter which hole they come out of.
|
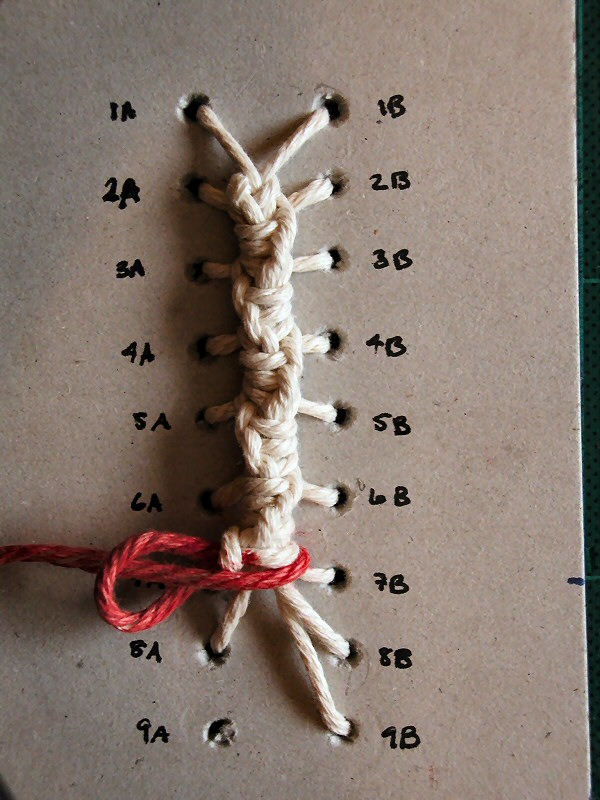
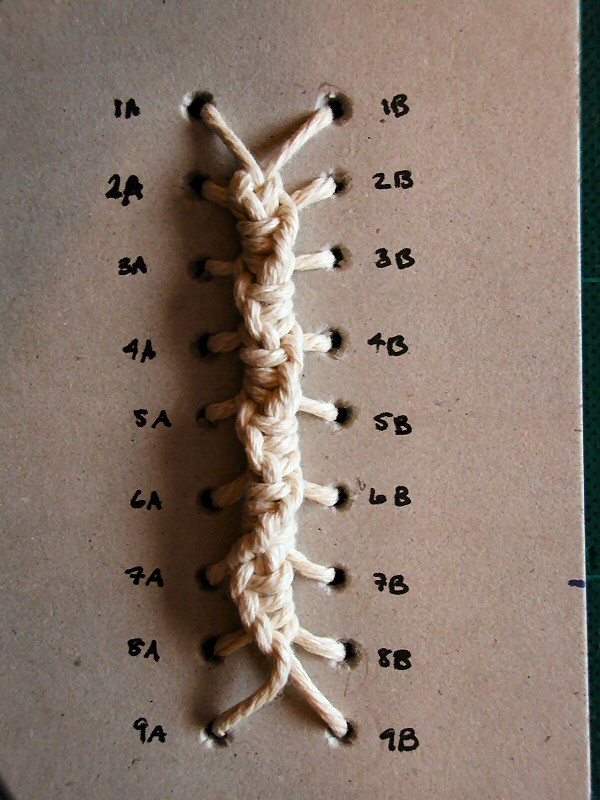
| In both cases, the millipede can finish with an open or a closed tail, depending on how far down the millipede you continue the stitch. | |
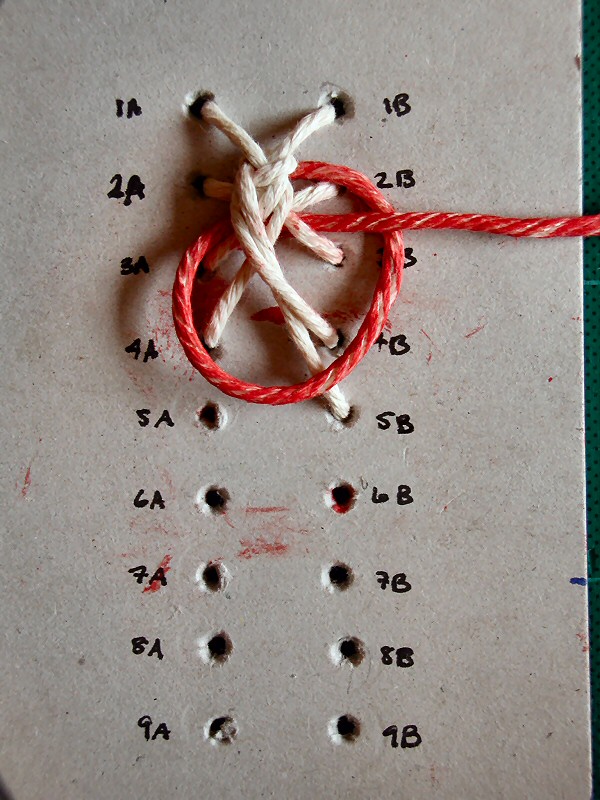
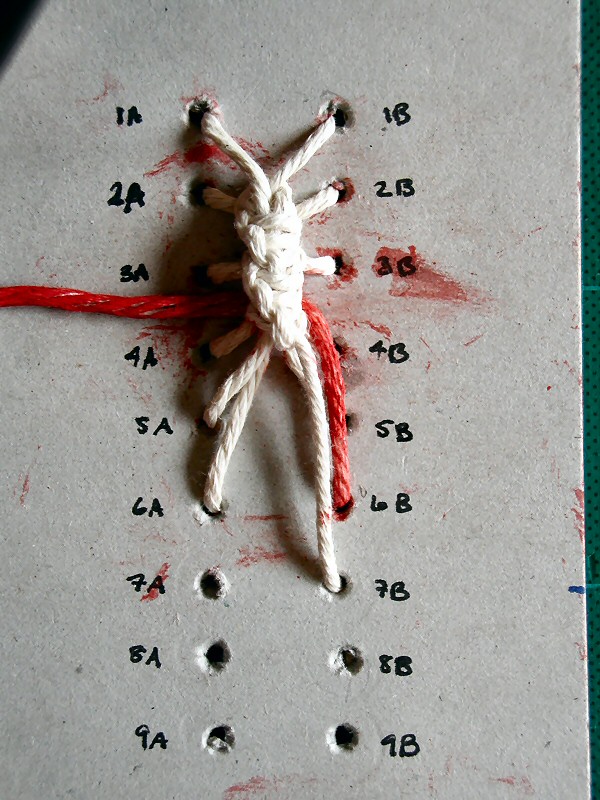
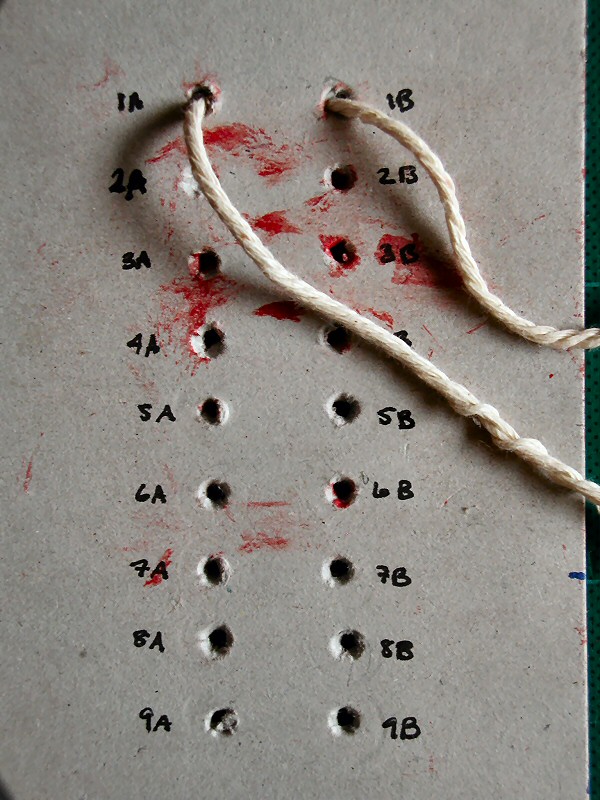 H1. Like all double-needle stitches, the half-hitch millipede starts with two threads coming out of two holes, in this case 1A and 1B.
 H2. Take the thread that came out of 1B and pass it into 2A.
 H3. Take the thread that came out of 1A and pass it into 3B, passing over the thread from step H2.
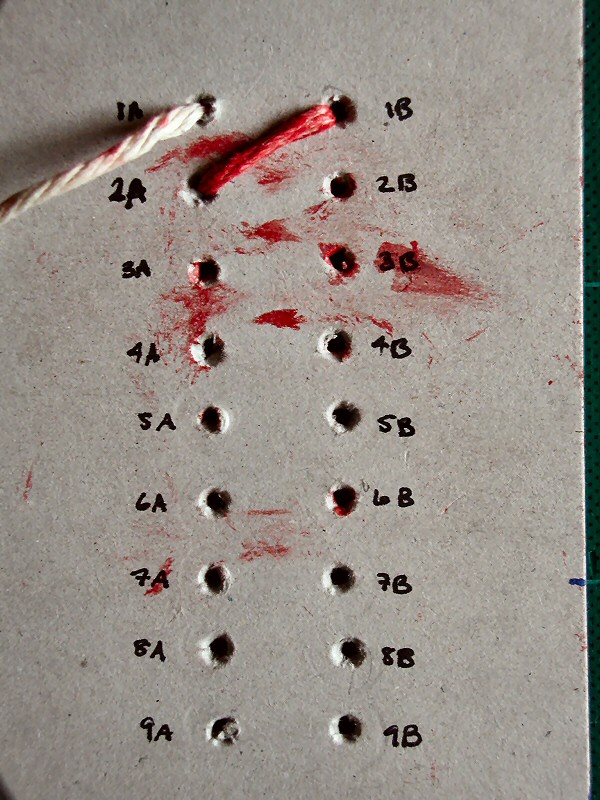
 H4. Take the thread that went into 2A and draw it out of 2B. Pass it in front of the X formed by steps H2 and H3, then round behind the stitching in between rows 1 and 2. Go back into 4A.
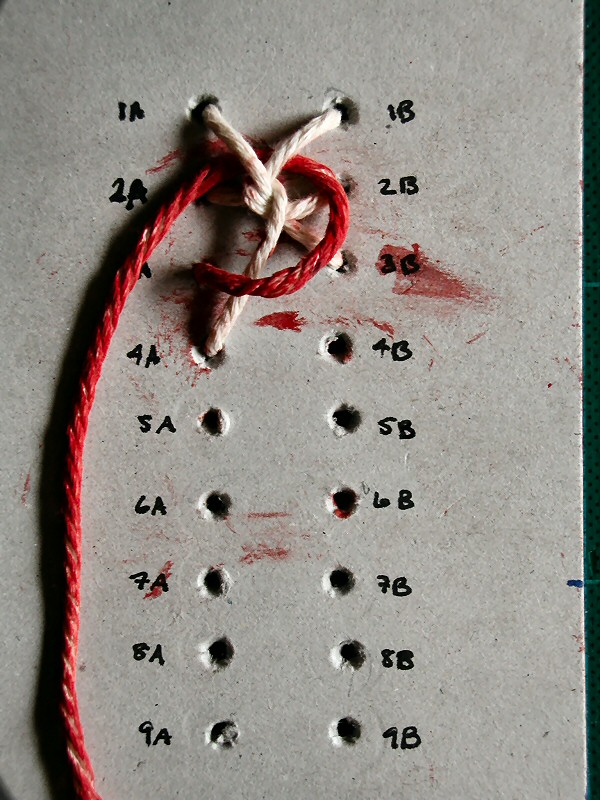 H5. Take the thread that went into 3B. Pull it out of 3A and bring it across the front of the work. Pass it behind the accumulating knot, between rows 1 and 2.
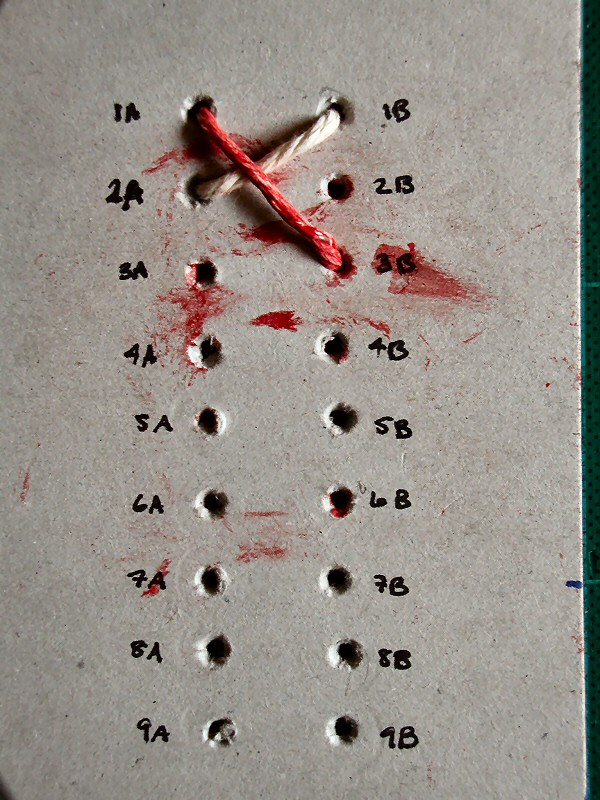
 H6. You're still working with the thread from step H5. Bring it round the front of the work again, and once again pass it behind the knot between rows 1 and 2. Pull the thread forward through the loop just formed, creating a half hitch.
 H7. Pull the knot tight. You've just created the "head" of the millipede. Now thread the cord back into the work in hole 5B
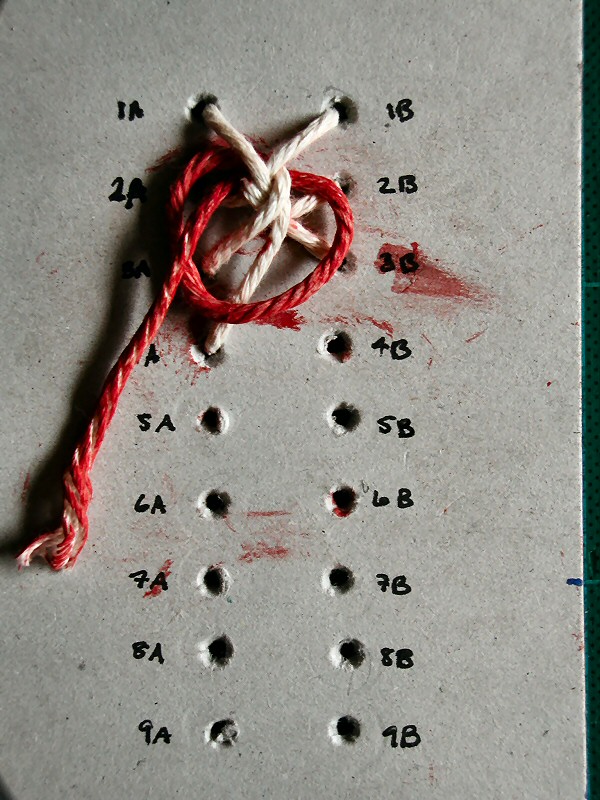
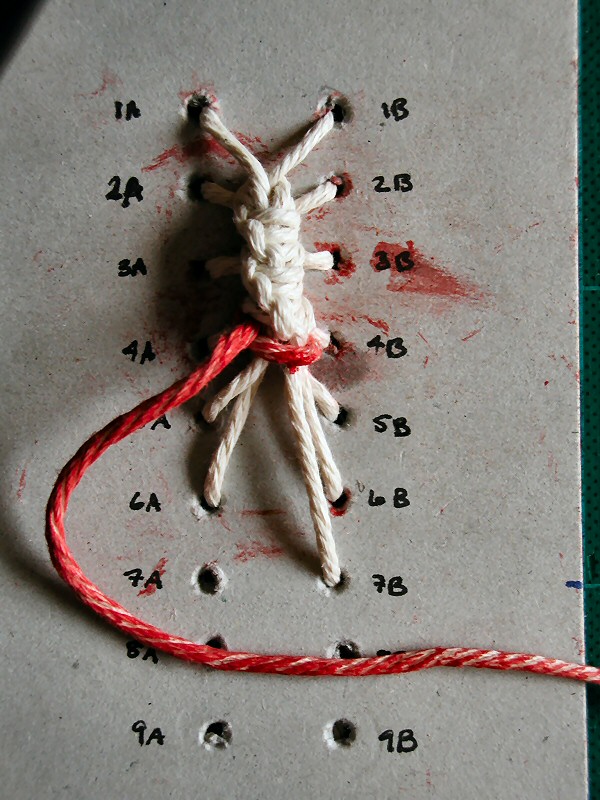
Use these steps on any thread that emerges from column B. I find them a pain to do as a right-hander, but they do create a symmetrical effect. If you just can't face it, do the Crossover Rightward Twist below.
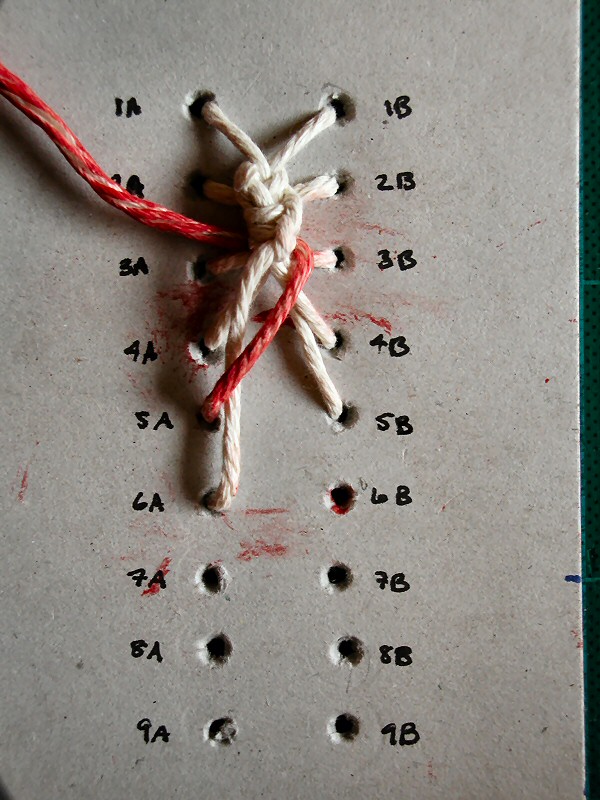
 L1. Start working with the thread you threaded into hole 4A (or any left-hand hole). Bring it out of 4B (or whatever its equivalent right-hand hole is) and loop it across the front of the work, then back behind the last body section you've completed (in this case, between rows 1 and 2). This will link the knotting you're about to do to the previous section.
 L2. Still working with the thread from step L1, bring it round the front of the work again, then slip it behind the first uncompleted section (in this case, between rows 2 and 3). Bring the thread out through the loop you've just created.
 L3. Draw the knot you made in step L2 tight, making the first half hitch of that section of the millipede. Repeat steps L2 and L3 as many times as is needed to fill the gap between rows 2 and 3, then thread the cord into the left-hand hole in the next unoccupied row (here, hole 6A).
This is the process to use on any thread that emerges from column A. I suspect a left-hander would find these as much of a nuisance as I find the Leftward Twist above, in which case you can reverse the Crossover Rightward Twist below and make an asymmetric millipede instead.
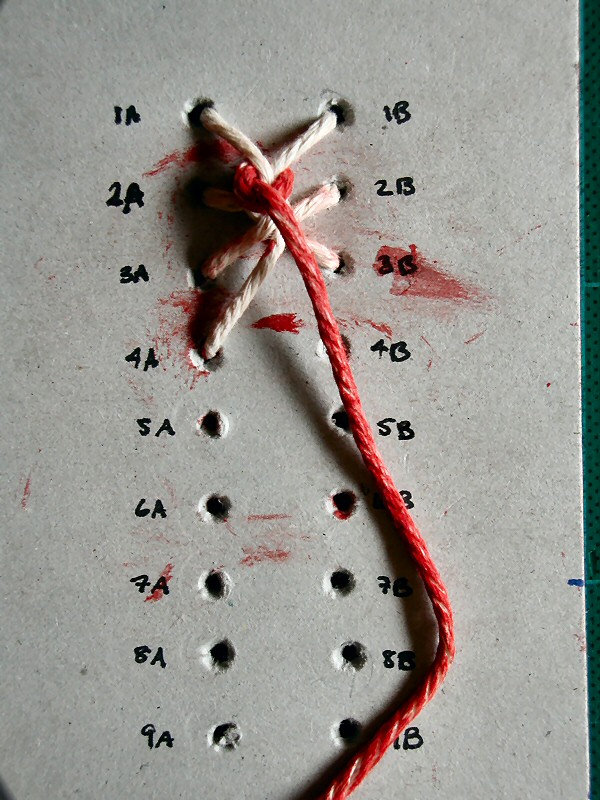
 R1. For the next section of the millipede's body, use the thread you previously threaded into a right-hand hole such as 5B. Bring it out of its left-hand equivalent (here, 5A) and loop it across the front of the work, then back behind the last completed body section (in this case, between rows 2 and 3). This will link the knotting you're about to do to the previous section.
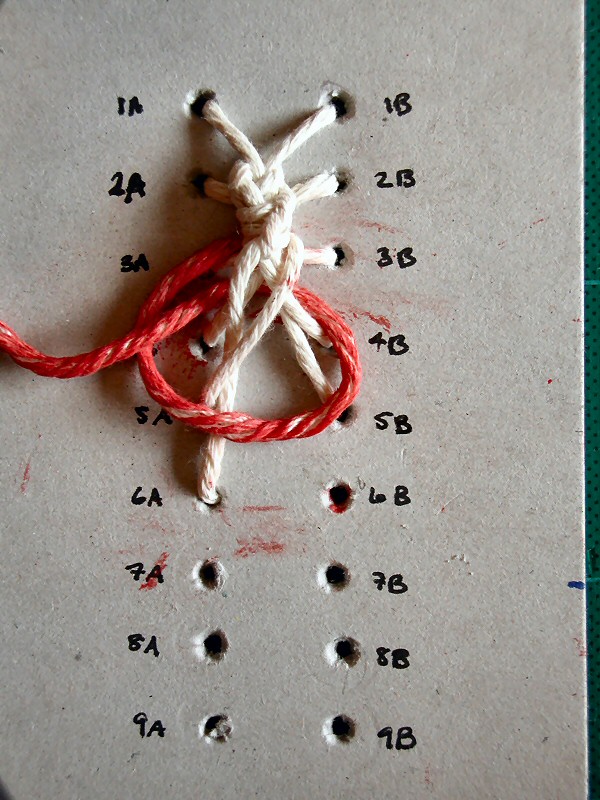 R2. Still working with the thread from step R1, bring it round the front of the work again, then slip it behind the current body section (here, between rows 3 and 4). Bring the thread out and through the loop you've just created.
 R3. Draw the knot you made in step R2 tight, making the first half hitch of that section. Repeat steps R2 and R3 as many times as is needed to fill the gap between the rows, then thread the cord into the right-hand hole of the next unoccupied row (in this case, 7B).
This is an alternative to the Leftward Twist for threads coming from holes in column B. Basically, you use the first move to reverse the direction of the thread by not crossing front of the work as usual. You then reverse the direction again at the end of the move so the thread goes into a Column A hole.
This stitch creates an asymmetric millipede rather than a symmetric one, and is easier for a right-hander to do. A left-handed bookbinder might want to reverse it and use it to replace the Rightward Twist on threads emerging from column A for a mirror-image of the asymmetric millipedes I create.
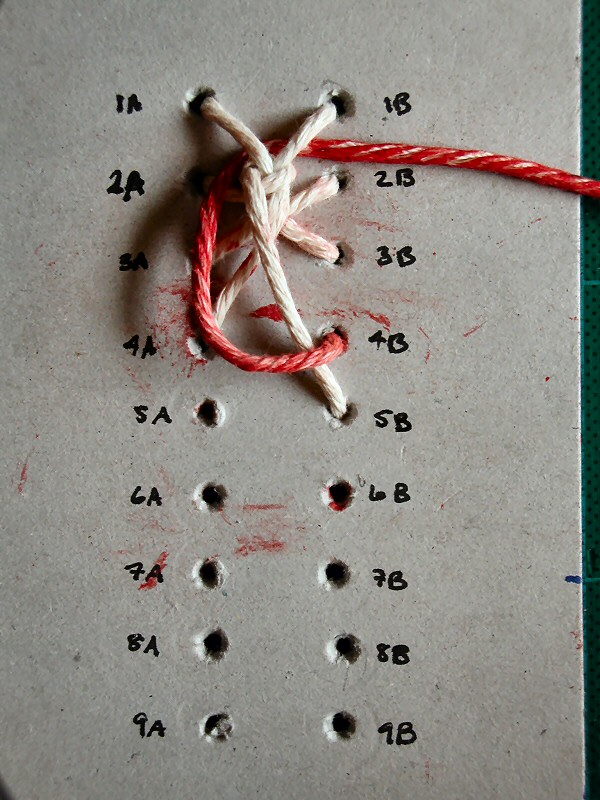
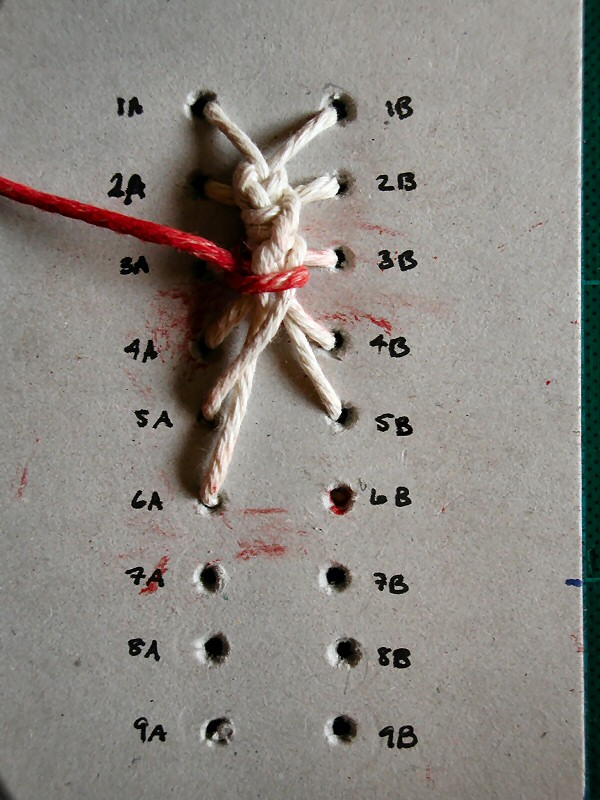
 XR1. Use the thread you previously threaded into a left-hand hole such as 6A. Bring it out of its right-hand equivalent (here, 6B). Rather than pulling it across the front of the work, bring it up along the right side of the milipede to the last completed body section (in this case, between rows 3 and 4). This will link the knotting you're about to do to the previous section.
 XR2. Still working with the thread from step XR1, bring it round the front of the work from left to right, then slip it behind the body section you're working on (here, between rows 4 and 5). Bring the thread out and through the loop you've just created.
 XR3. Draw the knot you made in step XR2 tight, making the first half hitch of that section. Repeat steps XR2 and XR3 as many times as is needed to fill the gap between the rows, then thread the cord into the left-hand hole of the next unoccupied row (in this case, 8A).
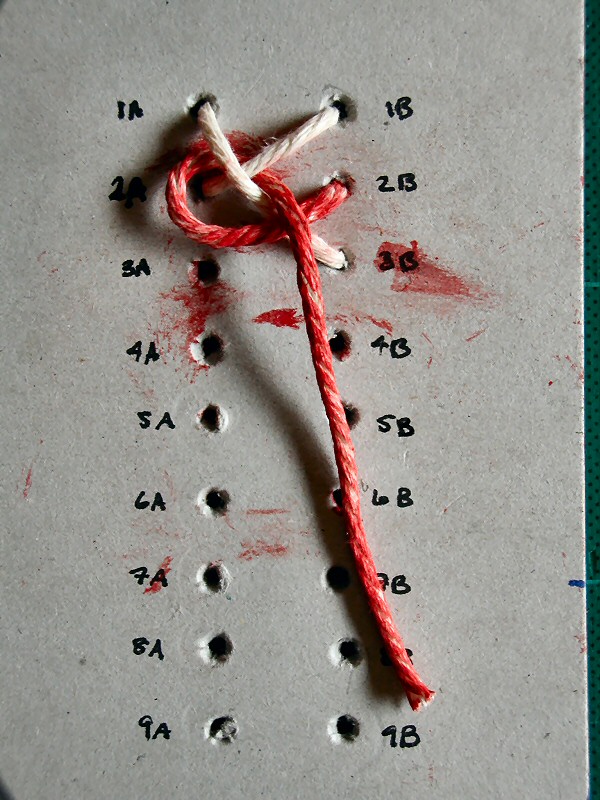
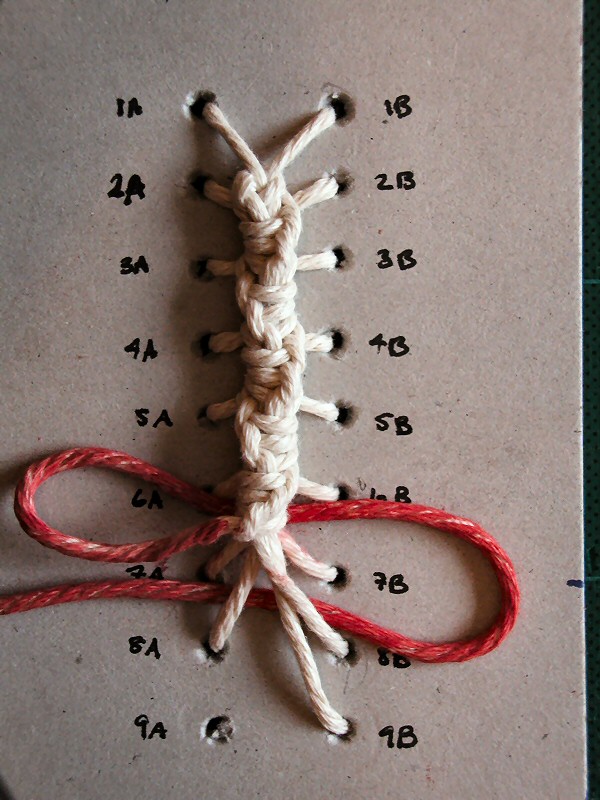
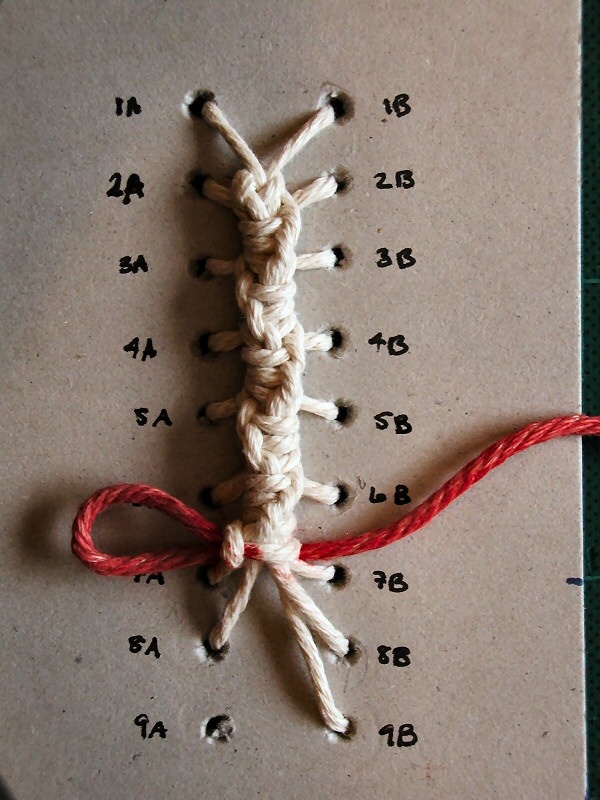
OT1. When you have inserted a thread into the last row of holes in your planned millipede (in this case, hole 9B, you're one body segment away from finishing an open-tailed stitch. Simply take the loose thread for the next section (coming out of 8B in this case) and knot as usual. Then, when the body segment is completed, thread that end into the other hole in the last row of holes (9A here) and tie it to its counterpart.
Creating a closed tail is a bit more tricky, requiring one thread to create two sections. To make a visual "break" in the knots and change directions, the thread passes behind the work in between body segments.
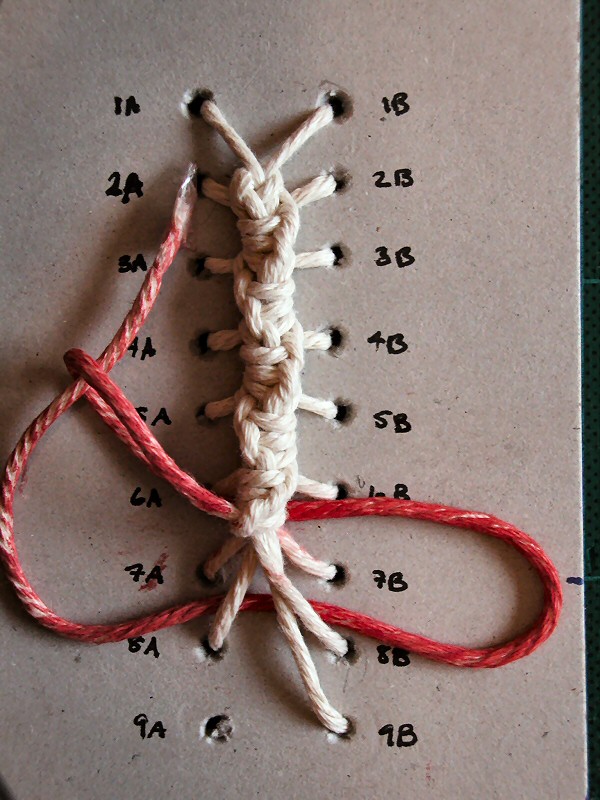
CT1. When you have inserted a thread into the last row of holes in your planned millipede (in this case, hole 9B, you're two body segments away from finishing an closed-tailed stitch. The first part is easy: simply take the loose thread for the next section (coming out of 8B in this case) and knot as usual.
 CT2. Now things get interesting. Pass the thread behind the work at the current section (here, between 6 and 7), continuing the direction of twist (in this case, clockwise). Pass it back behind the work the other way, one section down (here, between rows 7 and 8). Don't pull the thread tight - you've created a loop that you'll want to use.
 CT3. Now pass the thread through the loop you've created and pull the knot tight.
 CT4. Take the thread that comes out of the knot you've just created and pass it behind the work. Leave a loop behind.
 CT5. Bring the thread round the front of the work and pass it through the loop. Pull it tight. You've just made a half hitch and are ready to complete the body segment as you have already been doing on the millipede.
 CT6. When you get to the end of the segment, simply pass the thread into the remaining hole and tie off with the other end.
Once you've mastered the half-hitch millipede, you can learn how to curve it.