15.3 x 21.8 x 1.6 cm
This was bound as a gift for fellow binder Chris Busta-Peck, whom I know from Everything2. It was the first time I felt I had truly exceeded myself as a book artist.
I was drawing a blank on cover designs, so I started the forwarding and hoped for inspiration. I didn't do anything fancy - just sewed the signatures onto tapes, trimmed the fore edge, rounded, and started trimming the head of the book block. (Then I spoiled it all because of my terrible working press, and stopped to make a better one.) When I finally had a trimmed book, I rounded the back and attached the split boards.
I've always liked Chris' name, and thought that it would be fun to incorporate the three initials into a binding. Just sitting down and writing them out gave me central idea of the bind: modifyng the traditional shapes of a half binding to reflect the letter forms.
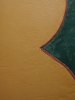
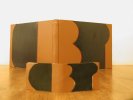
 After some preliminary sketches, I decided that I needed to try the design out in real life. I had some spare scraps of green leather and bookcalf in strips about an inch high. I cut the interlocking shapes and attached them together with masking tape, then folded the assemblage in the middle to give it a "book" shape.
I liked the design, though I felt the curve on the "C" was a bit too extreme for the effect I was after. Also, the green leather was thicker than the calf, which is an awkward combination. Had it been the other way round, I could have shaven the edges of the spine and fore edge strips to smooth the junction. Having a recessed inner panel on a quarter or half binding is quite common - it protects the paper usually used there. But having the corners and spine lower than the central panel? I didn't like the feel that would give. I had to look for something else.
I was determined to use the tan bookcalf for the spine and edges. I thought Chris might like having a calf-bound volume, and the color "felt" right somehow. But when I paired it with the other leathers I had of suitable thickness, nothing really sang to me the way the deep jade green of the prototype did.
I decided to try the traditional option: paper rather than leather. I had some deep green 200 gsm paper that I had bought before I had much leather to bind with. The only problem was that this binding was intended as a sketchbook, which means that the covering had to be hard-wearing as well as attractive.
On a very early binding, I discovered that multiple coats of dilute PVA could seal paper against staining. It gives the surface a cool, glossy coating, like polished stone. The only trick is to keep it from cockling, which means controlling the dilution carefully. The PVA has to be thinned enough that it soaks into the paper rather than just lying on top, but not so thin that it soaks through it and warps it.
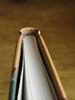
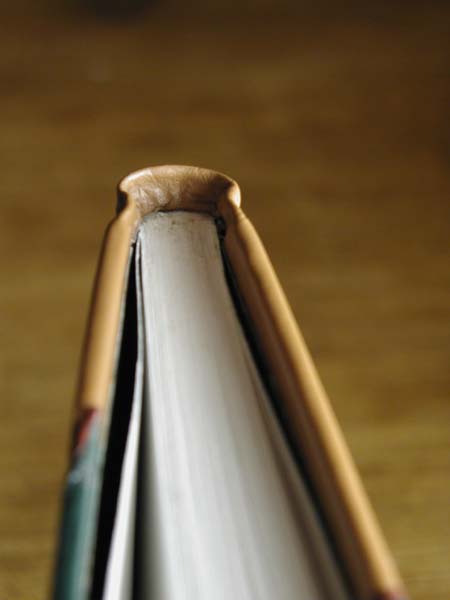 Rather than give the book headbands, I thought I would try for a headcap. Early books used a small fold of leather over the head and tail of the spine rather than the sewn or glued striped affair of modern times. I had read the description of one in The Craft of Bookbinding, but never seen a picture, so I decided to try it out from the description alone.
(Later, having learned to make headcaps properly, I can tell that I was pretty far off the mark.)
 I expected that the hardest part of the binding would be to match up the curved cuts between the calf and the paper. Curves are hard to match up at the best of times, and the differences in textures and cutting behavior worried me. I was right, too - the edges were very uneven.
The best solution seemed to be to inlay a thin strip of something in between the two sufaces. It was easier to match the curves with both pieces already in place, so when I cut the channel between the two surfaces, it came out fairly even. I found some scraps of a rich red glazed goatskin that went well with the green and tan, and cut them into narrow strips the size of the channel. Gluing them in with PVA was fairly easy, although contimuing the curves over the edges of the boards gave me some bad moments. The hardest part was probably the meeting of the curves in the "B", but even that came out acceptably.
Looking back at this binding, half a year onward, I realise that I haven't learned the lessons from it that I should have.