| Go to Site Map | ||
 |
 |
 |
|
Click on a ribbon to follow a specific book |
||
| Go to Site Map | ||
|
|
|
|
|
Click on a ribbon to follow a specific book |
||
This step was performed on all three books.
The final process in completing the books was to glue down the endpapers. For the blue book, this is a key structural process, which attaches the book block to the case. On the green and red books, it's purely cosmetic.
Be warned - they way I do endpapers is not standard. They are essentially "made" endpapers, but done in a different order. I have found that it worked better for me as a beginner than the methods I have seen in books.
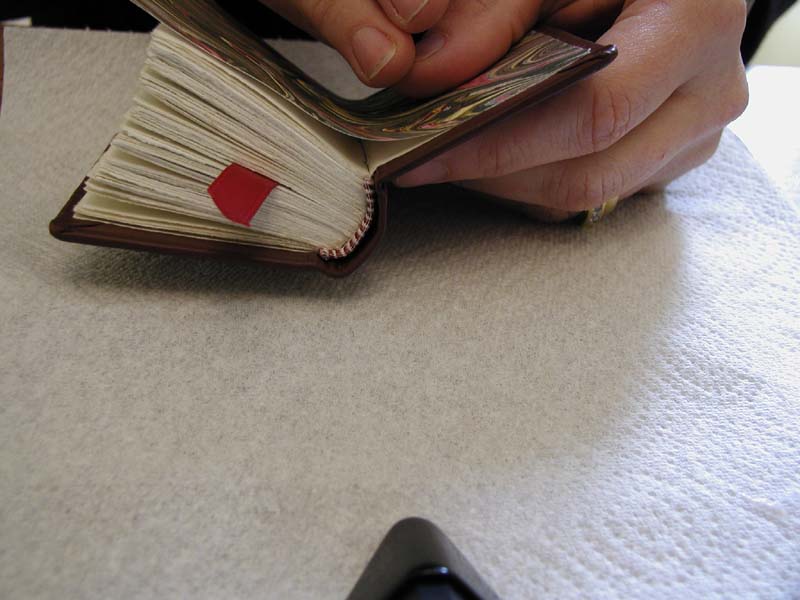
Before sticking the endpapers down, I trim the leather on the inside of the covers. No matter how evenly I cut it, no matter how perfectly I place it, the edges where I turn the leather over the boards will be slightly wobbly. It's a function of the elasticity of the leather. Also, having done my corners in my usual style, I have a little rhombus to remove from the end of each tab.
It's important to leave the leather long enough that the edges will be hidden under the endpapers. For these books, where the block is already in place, deciding where to cut was easy. Using a book of similar thickness under the front cover, I opened the front cover so that the board was level with the book block. I then laid a ruler along the first leaf of the book block, about 3 millimeters in from the edge. Cutting the leather turn-up along the line of the ruler gave me an even edge.
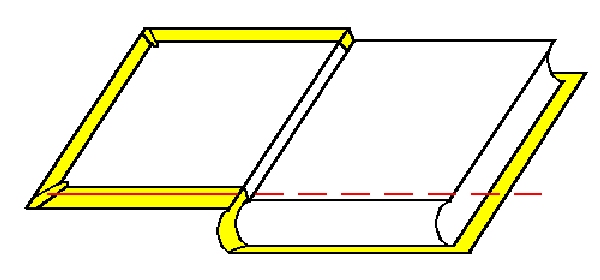
Diagram for the trimming of the leather turn-in. The solid red line is the trimming line. The dashed line shows how the trimmed leather is within the bounds of the book block.
Trimming leather on a case is much easier than trimming it on boards already attached to a book. I still used the book block to determine where to trim, placing it into the case in its future position. (Make sure the squares - the visible edges of cover around the book block - are even.) I made a dent at the intended cut line with a pointed bone folder, then set the book block aside.
I lined up my ruler on the dents, ensuring it was parallel to the edge of the case. I then cut along it on both boards. The important thing to remember in trimming the leather on a case is not to trim the turn-up on the spine. That's a great way to cut through both layers of leather and have to start all over again.
Then I used the pointed folder to mark the fore edge turn-ups for trimming. I marked the trim line the same distance on the fore edge as I had used on the head and tail. Before cutting, though, I put the book block back into the case and checked that the trim line would not show. Only then did I make the cut.
2005: At the time of this experiment, I used to stick the outer leaf of the book down to the boards after trimming the turn-ins in order to counteract the pull of the leather on the outside of the covers. This worked, but left the chance that an edge of plain paper would show from under the marble. A better technique is to cut a piece of paper the size of the recess between the turn-ins and use that to counteract the pull. Make sure the grain runs the same direction as the grain on the cover material (head to tail).
It is important to use the same kind of adhesive on both sides of the boards. Otherwise, the pull of the different materials, and the inevitable expansion of the cardboard in between them, will produce a warped cover. Had I been working with fabric covering (which is better stuck down with PVA), I would have used PVA on the end leaves. Working with leather and wheat paste on the outside of the books meant using wheat paste on the inside as well.
2005: To fill the space once the boards are lined and straight, cut thin cardstock or thick paper to fit the gap and glue it down. This will prevent the ridges of the leather turn-ins from denting the book block in the future.
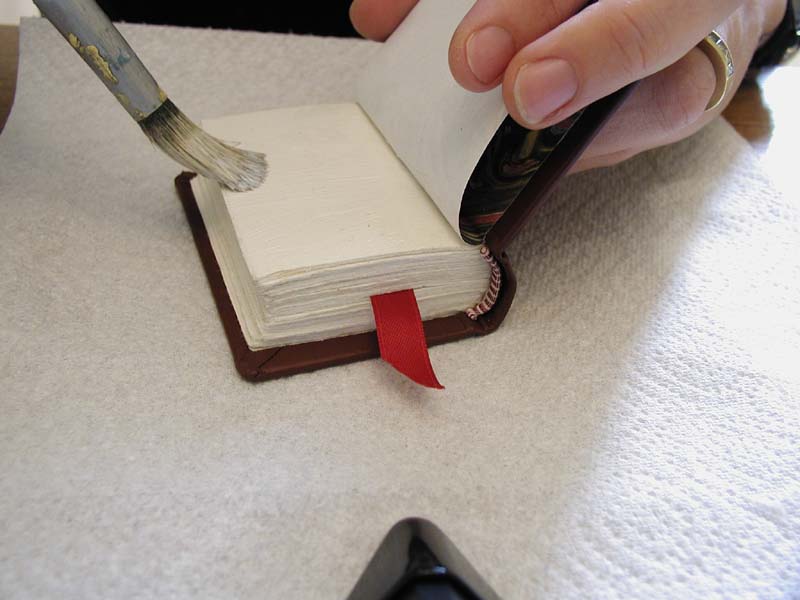
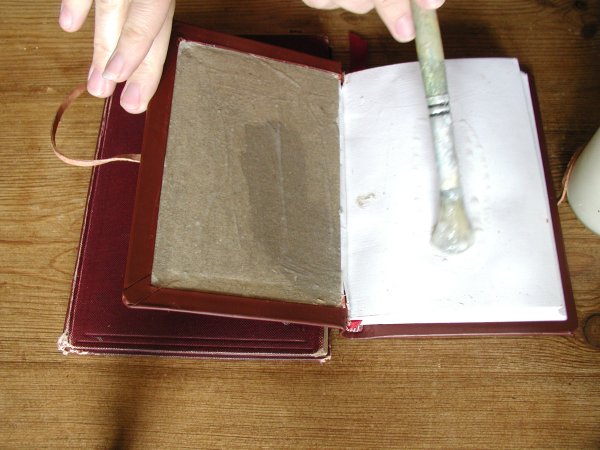 I brushed the outermost sheet of the front of the book block with wheat paste.
 For the blue book, I also saturated the fabric tab coming off of the spine and stuck it to the outer sheet of paper. Then (on all three books) I put some paste on the exposed parts of the board so the cardboard wouldn't soak up all the moisture too soon.
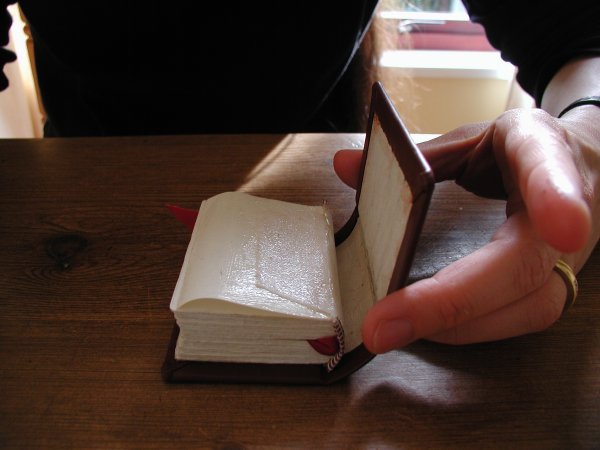 When I was working on the blue book, I fitted the book block into its case, pasted page up, and made sure it was straight. The other books were already straight against their covers, of course.
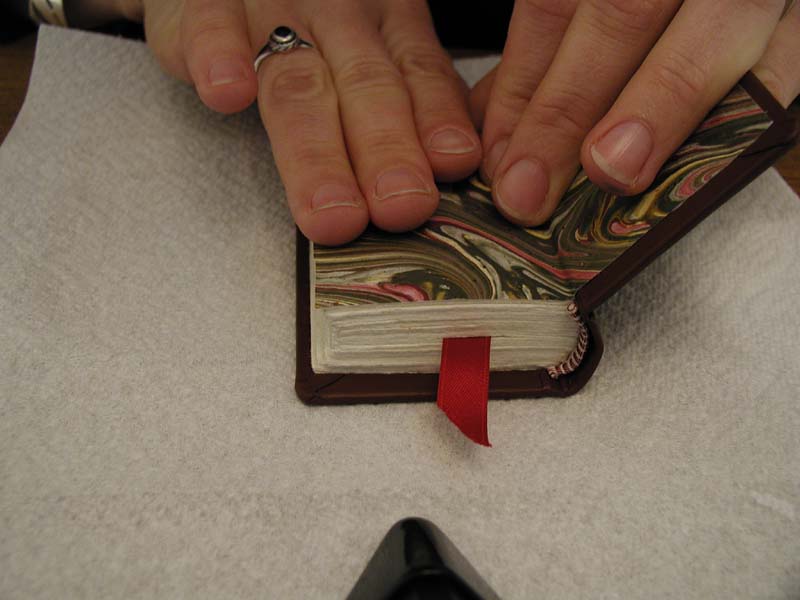
 Then I simply closed each book and pressed down hard. If you're doing this, don't open the cover after you've pasted down the outer leaf. Premature opening stretches the paper. It'll either tear at the hinge, or wrinkle when you close it again.
I repeated the pasting and closing on the other side of each book. Then it was time to prepare them for pressing. As always, I removed the ribbon from the book block, then slipped a piece of aluminium flashing in between each cover and the book. (For the red book, I re-used the cardboard inserts to keep the cover bands from being crushed.) I put the books under heavy pressure until they were dry.
I cut a piece of marbled paper as tall as the book block and twice as wide, taking care that the grain ran in the same direction as the pages of the book. I brushed PVA over about 2/3 of the back of the marbled paper, ensuring even coverage all the way to the edges. Opening the book block with care, I lined up the glued edge of the marbled paper with the pasted-down leaf on the inside cover. Once it was straight, I pressed it down all the way to the hinge, ensuring there were no wrinkles in it.
 Using my pointed bone folder, I gently pressed the marbled paper into the hinge.
 Next, I brushed adhesive onto the first leaf of the book, again going all the way to the edges.
 I then smoothed the marbled paper over the glued up leaf. It took some gentle sliding to get it straight (you can't slide too firmly or the paper will tear). It hung over the fore edge of the book block; I would trim it later. I wiped up the excess PVA and closed the cover.
I carried out the same procedure on the other cover of the book, then prepared the whole thing for pressing again. I slipped a piece of waxed paper between the glued leaf of the book and the book block, and replaced the aluminium flashing between the boards and the first leaf. Then I put it back under firm pressure for another 24 hours.
After the second round of pressing, I trimmed the marbled paper back to the size of the book block. And, as the final touch, I stamped the evilrooster "chop" in each one, on the inside of the back flyleaf. The books were done, though I left them in the press for several more days. It is advisable to give the newly bound book as much time in the press as you can, to give the boards a chance to dry thoroughly. Otherwise, the boards may warp over the next month or so.
|
Go to Site Map |
||
 |
 |
 |
|
Click on a ribbon to follow a specific book |
||