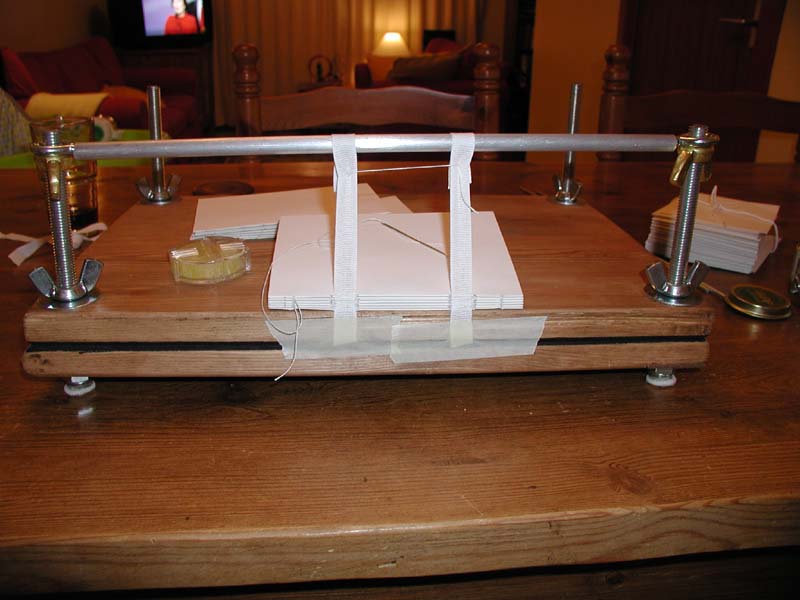
As I was developing my first book press, I was struck by the similarity between a book press of that design and a sewing frame. The top of the press could serve as the flat surface for the signatures. The threaded rods at the corners are ideal for uprights, even providing the adjustability of a "proper" frame. I spent a few minutes rigging the crossbar and was ready to sew, though later developments would show that there was more to do.
I made two refinements to adapt the press for sewing.
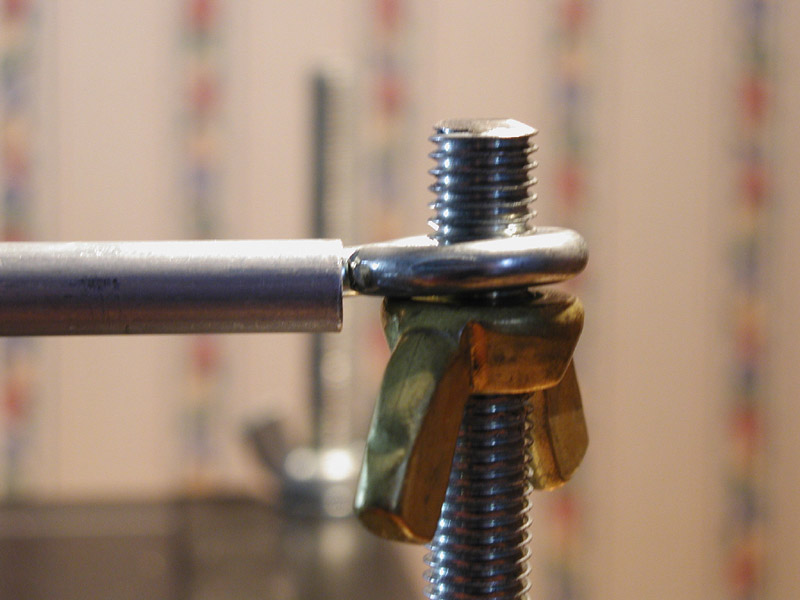 The crossbar is an aluminium tube just shorter than the distance between the threaded rods. It is attached to the threaded rods with eyebolts whose shanks are inserted in each end. The eyes of the eyebolts then rest on two upside-down wing nuts threaded onto the rods.
I have used this structure on all of my sewing frame designs. It is strong, adjustable and cheap.
Since the threaded rods are set back from the edge of the press, I couldn't simply attach the bottoms of the tapes or cords to the front edge. To do so would have meant sewing onto the tapes at an angle, which would result in a crooked book block. (I did this for a while, and got very unsatisfactory results).
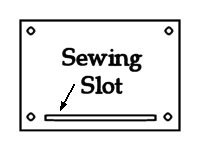 The solution was to cut a slot in the plates of the book press, in line with the holes for the threaded rods. The easiest way is to drill two holes, then use a jigsaw to connect them. Then the tapes or cords can simply drop straight from the bar down the slot, where you can use tape keys (or anything too large to fit through the slot) to keep them down there.
Although the slot is nomially in the pressing area, I have never pressed a book large enough to require the entire depth of the plates.
The plans for the book press include measurements for the sewing slot.
The only construction work required for this sewing frame is to ensure that you have a sewing slot in your book press. Adding the crossbar above it then gives you a sewing frame.
My first book press sewing frame didn't have a sewing slot. It seemed easier to make a press without one. I simply fastened the tapes or cords to the front edge of the press (see the picture at the top of this page). Since the threaded rods were about 15mm in from the edge of the press, this meant that all of the tapes and cords I sewed on were angled. All of my book blocks were misshapen, though as a beginning binder that was the least of my problems.
So lesson one is cut a sewing slot.
My metal press, which is also a sewing frame, only has the sewing slot cut in the top plate. It seemed easier to get the blacksmith to only cut the groove once. This is a nuisance - it means I have to raise the (very heavy) top plate and prop it up on something whenever I want to sew, because otherwise I can't get at the ends of the tapes. Had I requested two slots, the tapes would just drop through.
So lesson two is cut two sewing slots
Last of all, an observation. Once the metal press was complete, I quickly noticed that the long narrow strip of hardboard between the sewing slot and the edge was too weak. It broke almost immediately.