| Go to Site Map | ||

|
|

|
|
Click on a ribbon to follow a specific book |
||
| Go to Site Map | ||
|
|
|
|
|
Click on a ribbon to follow a specific book |
||
This step was performed on the blue book.
The essential difference between casing in a book (as I did for the blue book) and binding onto split boards (as I did for the green and red books) is that casing in involves making the whole cover of the book separately, then attaching it.
I was not originally in favor of this approach, because the cover is only held onto the book with the strength of the fabric and endpapers glued to its surfaces, rather than having a tab from the spine physically incorporated into its structure. However, I was interested to see whether this approach would be less finicky, since I had been struggling to get the split boards technique to work reliably.
To start casing in, one makes the case. I didn't photograph most of this process - the incident with the wheat paste put me behindhand on the blue book, and in the rush to catch up I forgot to take pictures. However, I did photograph the process on the next book I bound, a small volume in red leather with broad bands on the spine and cover.
The first step in making the case was to cut the boards. I use ordinary cardboard for covers, bought from an art supply store. Although it is not acid-free, my current binds are not archival, and proper greyboard costs more than I am willing to pay at this skill level.
2005: I should probably say a good word for archival work here, now that it's become a priority for me. But what I really want to say is be realistic. Balance the extra costs of a hobby you're just flirting with against the risk that you'll make something now that you want to last for centuries.
 I measured the height of the book block, and added 1 centimeter to it to allow for the cover overhang (called the "square"). That gave me the height of the boards (D on the diagram below) To get the width (A), I measured the book block from the spine turn-up to the fore edge.
 Next, I created the spine strip. It was the same width (C)as the kraft paper strips I had used in gluing up the spine, but made of stiffer paper. I glued leather strips onto the spine strip to make false bands, and cut them at an angle on the edges.
If you're following these instructions, but without rounding and backing your book, make your spine strip out of cover-weight cardboard. Give the French grooves a little extra space, and don't put false bands on it.
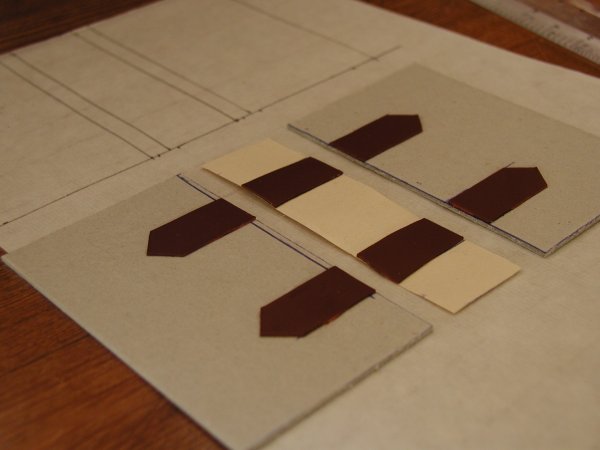 Then it was time to lay out the cover. I used a piece of rice paper (any even tissue will do) the size of the grey area on the diagram above, and marked it as shown. The rice paper serves to space the boards out from the spine strip. That gap, B, becomes the French grooves on the final book, and serves to make the cover open more easily. It should be no more than half a centimeter wide. Since I cut the board width (A) to match the width of the book block, the gap also determines the square on the fore edge. Note that the photo is from another book done using the same processes.
 Once the rice paper was marked up, I painted it with PVA glue.
 I then positioned the boards and spine, with the outside of the book up on the rice paper. It is almost impossible to slide things over the rice paper without tearing things, so the placements had to be right the first time.
 Inner structure of the case on another book.
| Go to Site Map | ||
|
|
|
 |
|
Click on a ribbon to follow a specific book |
||