I've read about several techniques for doing the corners of books. Some are incredibly fiddly, and many are more appropriate to bookcloth or paper than leather. Many require more precise shaving and cutting than a leather working beginner is capable of. Few are capable of withstanding a strong bash on the corner. This is one of the exceptions.
I ran across it on a visit to Trinity College in Dublin, a month after I started binding. We were there with my dad, looking at the Book of Kells. Before we got to the book itself, there was an exhibit on how the book was made. It covered lettering, illuminating, paper making, and, along one wall, bookbinding.
The bookbinding exhibit included a film of someone binding a book using medieval techniques. I was amused to recognise a lot of the equipment, but intrigued by the cover treatment. It seemed to create a neat, compact corner.
This technique doesn't require great precision in cutting, unlike those corner-mitreing procedures that require you to cut at exactly 45°, precisely a board thickness away from the point of the board.
Also, a normal mitred corner isn't strong enough for a book that suffers heavy abuse. My work notebooks, which get carried around all the time, are proof.
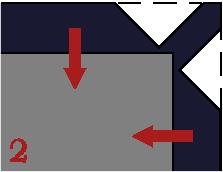
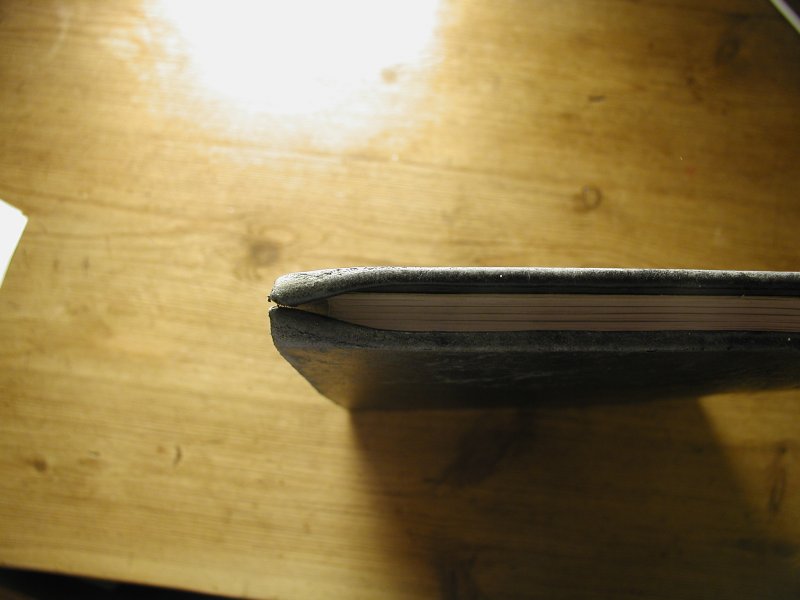 Here's what happens to the corners after nine months of hard use. The inward denting is inevitable, though the slight curve of a tabbed corner would have reduced the bending.
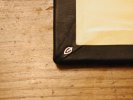
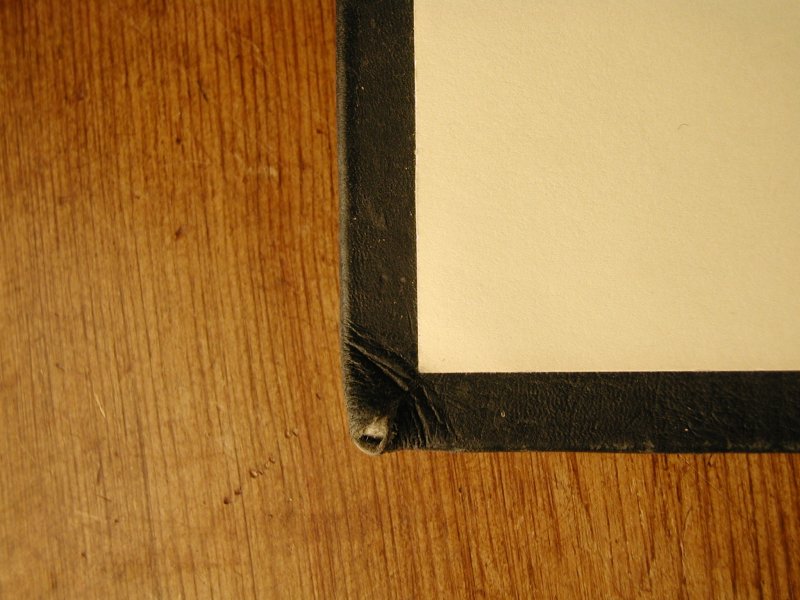 However, with normal mitred corners, bending causes the splitting evident in the second picture.
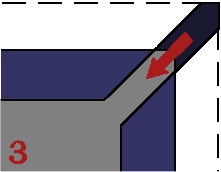
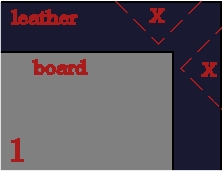 Before applying paste to the leather, cut two triangles out of the corner of the leather (The areas marked with X's on the diagram below). They should follow a line at a 45 degree angle to the cover corner, but leave a tab between them.
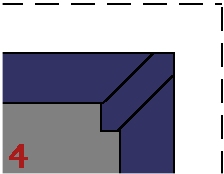
 After pasting up the leather and sticking it to the cover, fold the edges of the leather over the edges of the boards. The edges may or may not meet, depending on how you've done the diagonal cut.
 Then fold the tab over. It will cover any gaps left from step 2.
 Press it flat. You'll get a chance to cut off the protruding inner corner when you trim the edges before sticking down the endpapers.