

I've never run across any other binders that make beaded headbands. I came up with the idea in a craft shop, looking at the assortment of brightly coloured glass beads on offer. I've even seen some nicely drilled semiprecious stones that might work, if I had a binding large enough to look right with them (they're rather large).
I developed this technique through trial and error. My original approach was to make the string of beads, tied at both ends, and then stitch it down to the signatures with a series of tiedowns. However, that was a pain to get just right, and left unsightly knots sticking out of the sides of the spines. The technique described below is much easier, and leaves no awkward lumps if done correctly.
Many thanks to Emma Jane Hogbin, who playtested this description and gave me several valuable suggestions. I even nicked some of her pictures to add to my own (with her consent, of course!).
Before you jump into sewing, it's worth taking a minute to understand what you will be doing.
This technique uses both ends of a single piece of thread. One end, the short end, will hold all of the beads to make up the headband, but it will never go through any of the book. The other end, the (surprise!) long end, will do all of the tie-downs through the book block. It will only be threaded through the first and last beads. The two ends are divided by the first pass of the thread through the kettlestitch.
Confused? Trust me.
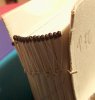
To start, use the needle to draw your thread through a kettlestitch hole. Draw it most of the way through. The remaining bit, soon to be the short end, should only be a couple of inches more than the spine width.
You should start sewing the beaded headband as far toward the front of the book as possible. Exactly how far toward the front depends on your endpaper structure. If you do it between a waste sheet and board paper, take care later when removing the waste sheet or you might leave the first bead unanchored.
Leave a little more thread for doubling up if you use a needle to thread your beads.
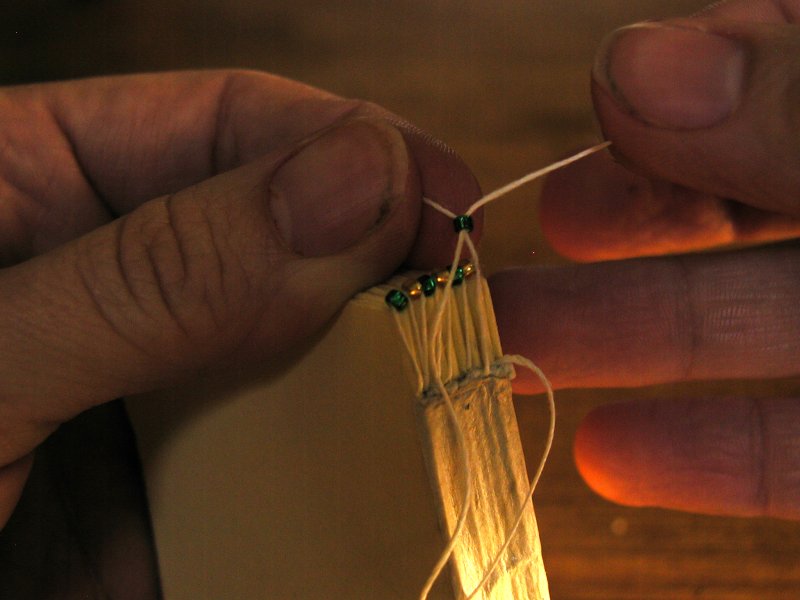
 Thread a bead onto the short end of your thread. Take the needle off of the long end and thread it through the bead as well, in the same direction. Pull the bead toward the signatures until it's firmly in place, and replace the needle on the long thread.
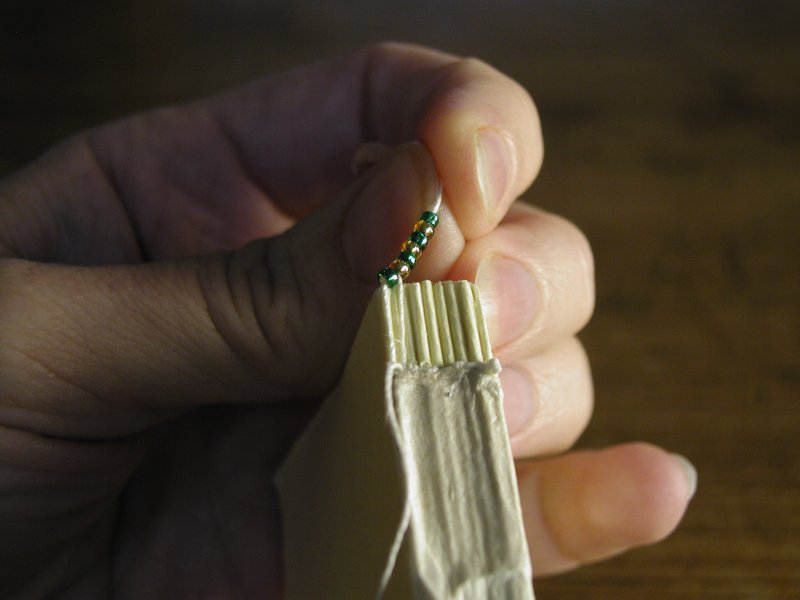
Thread a few more beads onto the short thread, in whatever pattern or alternation you want. If you know how many beads you're going to use in total, thread them all now.
Use a piece of masking tape on the end of the short thread, leaving enough space for some free play.
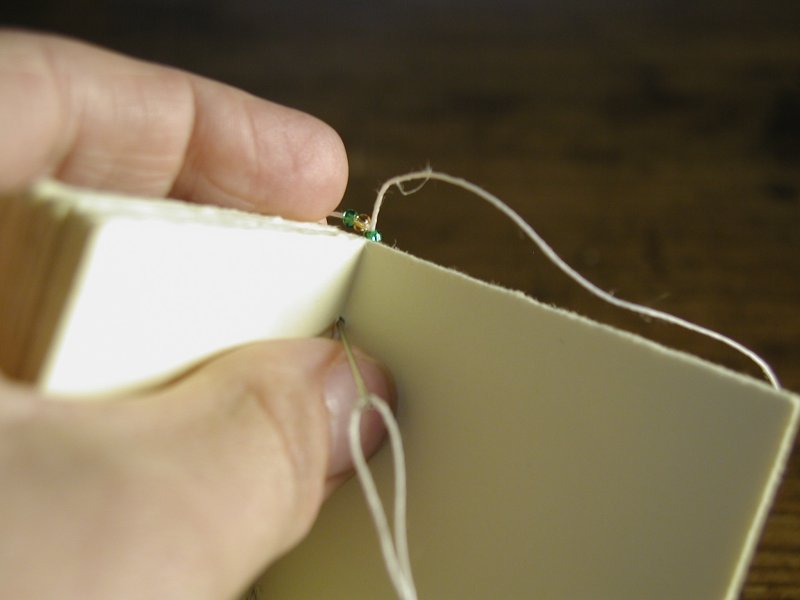 Take the long end and make a tiedown between the first (double threaded) and second beads. Simply insert the needle into the kettlestitch hole in the inside of the first signature and bring it out the back. Draw it snug but not tight. If it's too loose, the row of beads will flop around on the top of the book. If it's too tight, the tiedowns will drive the beads apart and leave unsightly gaps.
 Now make a second tiedown after that first bead. Lay the short end of the thread (with all the beads on) along the top of the spine. Wrap the long end of the thread over the short thread, in between the first and second beads and stick the needle back through the kettlestitch hole again, from the inside of the book block out. You'll now have two parallel lines of thread on the back of the book, one from step 1 and one from this step.
 Nudge the second bead against the first, compressing the tiedown thread. Make the next tiedown, bringing the long thread up in a diagonal line to pass between the second and third beads. This is the pattern you should follow across the spine.
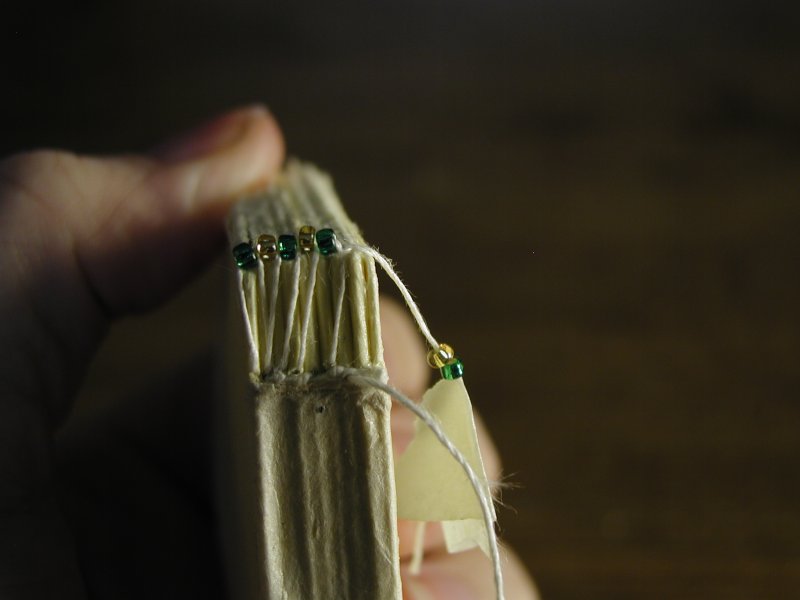 Keep making tiedowns between the beads until there are tow beads left on the short end of your thread. The back of the spine will have a series of parallel diagonal lines, as the long thread emerges from a kettlestitch just under one gap, and rises up to go into the next.
 End the headband the way you started it. After the tiedown between the second to last and last beads, take the needle off of the long end of your thread. Double-thread the last bead, again making sure the long thread goes through in the same direction as the short one.
 Now it's time to tie off.
Rethread the long thread on the needle and pass it through the last possible kettlestitch hole, from the outside in. Bring the short thread down into the book block to meet it. Then tie off the long and the short threads inside the pages if you're planning to do a tight back (otherwise the knot will lump up on the spine). The image below is for a hollow-back book, but the knot on the outside was still too large to hide. Don't do that.
If this feels too loose, you can "spring load" the final knot. Pull the long thread through the outside of the kettle stitch hole and into the book block. Then thread the short thread onto the needle and go through the last kettlestitch from the inside out. Loop the thread around the last vertical thread and pass it back through the kettlestitch to the inside of the book. Tie the two ends together and clip the threads. (Suggested by Emma Jane).
As with any headbanding, the threads on the spine will show unless you do one of two things:
Make the book a hollow-back book, so that the spine stands away from the back of the book block.
If the book is to be a tight backed book, pad the spine with enough kraft paper that you can sand it smooth before covering.
Examples of beaded headbands can be found among the Geocaching Mini-Tomes I bound in September of 2003.