| Go to Site Map | ||
 |
 |
 |
|
Click on a ribbon to follow a specific book |
||
| Go to Site Map | ||
|
|
|
|
|
Click on a ribbon to follow a specific book |
||
This step was performed on the green and red books.
Until the experiment, this was my default way to attach a book to its boards. Covering a book made this way is finicky, particularly for a beginner. But it's an immensely strong structure, because the fabric from the spine is incorporated into the boards. And like most beginners, I did not trust cased bindings to be as strong as they really are.
2005: I still use split boards more than any other technique. Although I know casing in is relatively strong, split boards are even stronger. And I don't really like the look of the visible tab glued to the inside of the covers of a book.
The first thing to do is to glue up the split boards. I used two kinds of cardboard. The heavier board is the same thick cardboard I used to make the case for the green book. The lighter board was from a cereal packet. These materials are not acid-free, but then I am not good enough at binding to do archival work yet.
2005: I don't use cereal boxes any more. Many major stationery suppliers sell reams of 200gsm cardstock for a reasonable price; these make excellent split boards (and spine strips, and many other things. However, I do not regret using the most easily available materials when I was just starting out.
I measured the height of the book block, and added 1 centimeter to it to allow for the cover overhang (called the "square") to get the overall board height. That created an overhang on both the top and the bottom edges - the squares on the books were 5mm all around. To get the width, I measured the book block from the spine turn-up to the fore edge. There was no need to add anything for the square on the fore edge, because my binding technique includes French grooves. See the diagram below for an explanation.
 The board width (A) is equal to the width of the book block from the spine turn-up to the fore edge. On binding, the board is slid forward so that the space for the French groove (B) equals the fore edge square (C).
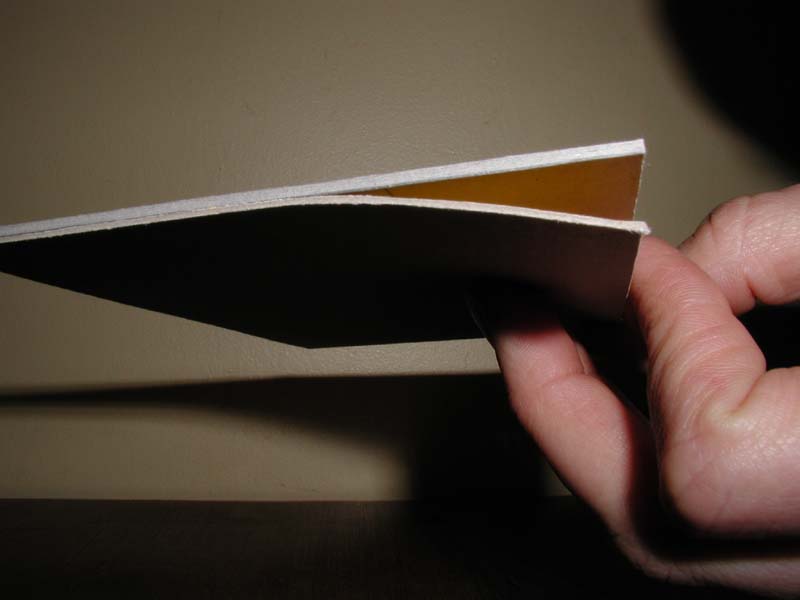 I cut two pieces of the thin cardboard the same size as the boards. Using wheat paste, I then pasted the thin board to the thick boards, leaving about 4 centimeters at the spine edge un-pasted. I then put the boards under heavy pressure for twenty-four hours to make sure they stayed pasted. When the boards were dry, they could be opened far enough to take the tabs from the books.
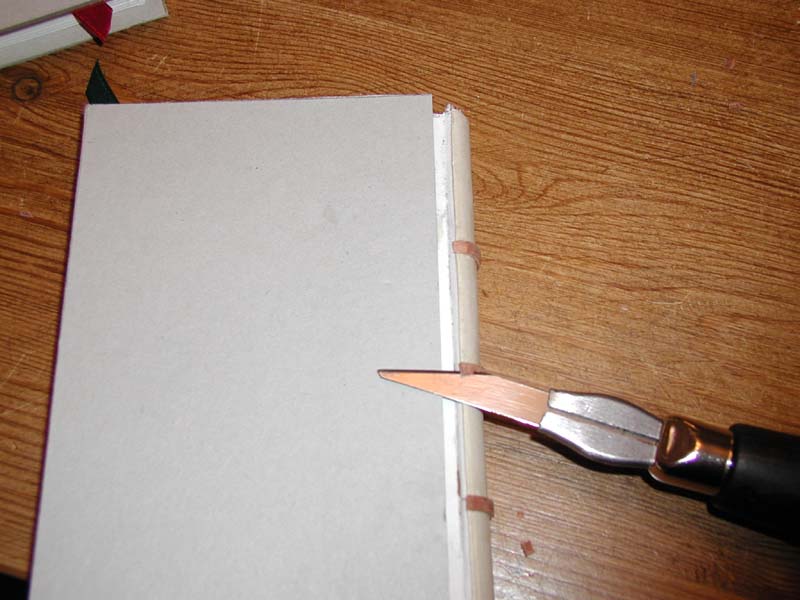
 Once the boards were dry, it was time to prepare them for receiving the book. Split boards are attached with the thin board on the inside. So, on the thinner boards, I marked lines 5 milimeters from the top and bottom to act as guidelines in placing the book. I did a dry fit, using a grooving rod to determine the space between board and spine, and trimmed any tabs that were too long.
Then I was ready to paste. I slathered wheat paste on the insides of the split boards, and slid the tabs in. I used the guidelines on the insides of the boards to position the book block vertically, and the line on the tab to get the correct distance from the spine. I then squeezed the book tightly and wiped up the excess paste from all the edges.
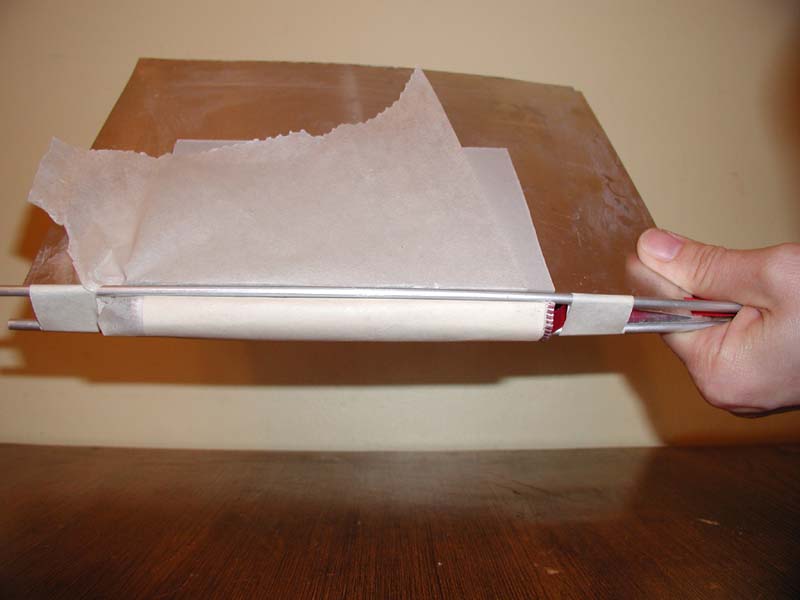 The book needed to dry in the book press for at least a day. But you don't just drop the book into the press; there's a lot of packaging to do. First, I made certain the ribbon was not inside the book. (Otherwise, it would tend to dent the pages around it.) Then I slid aluminium flashing between the boards and the book block, to protect the inner pages from moisture, paste and pressure. I wrapped the entire structure in waxed paper so that the paste wouldn't get all over my press, and laid grooving rods between the spine shoulders and the edges of the boards, to press the French grooves down neatly.
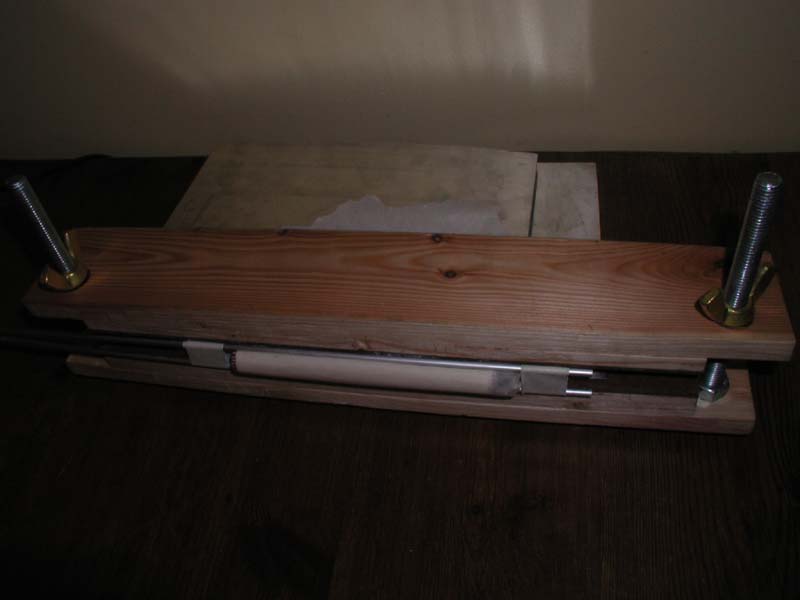 Then I put the whole package into the press under firm pressure and left it there for twenty-four hours.
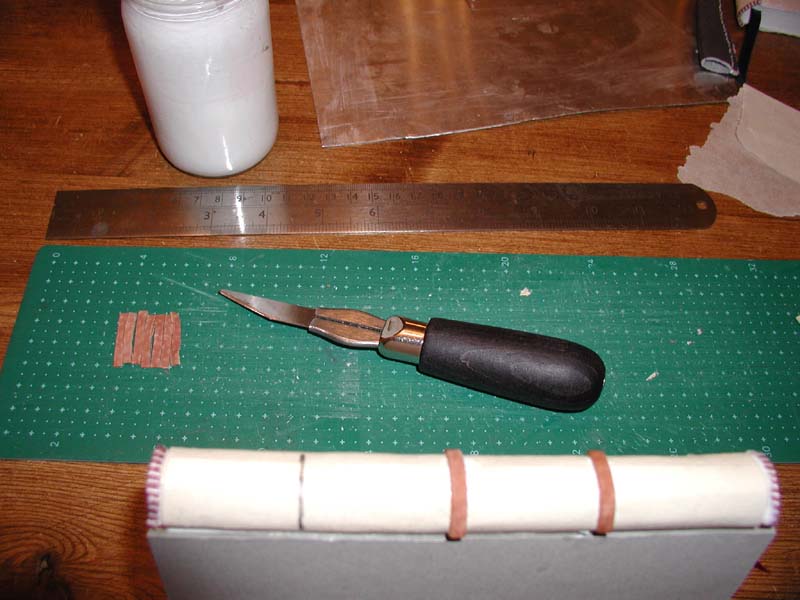 Once the book was dry, I had one more step to perform. Although the book was structurally complete, I wanted to add false bands to the spine. These were strips of leather, glued (with PVA) to the hollow back.
 Then, after the bands were dry, I cut them at an angle at the sides of the spine. They were ready for covering
| Go to Site Map | ||
 |
 |
|
|
Click on a ribbon to follow a specific book |
||